Go to: httphttps://elandingst.alaska.gov/elandings/Loginweb
Enter the following user ID and password:
...
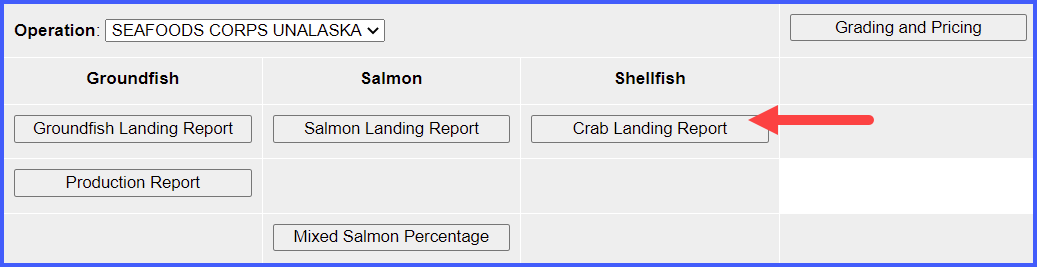
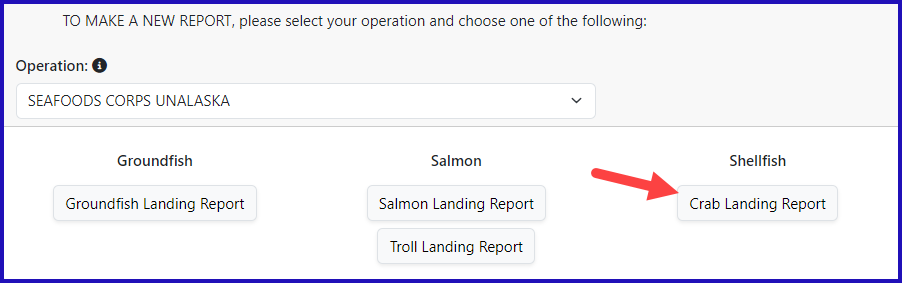
- On the Reports Menu page, click on the Crab Landing Report button
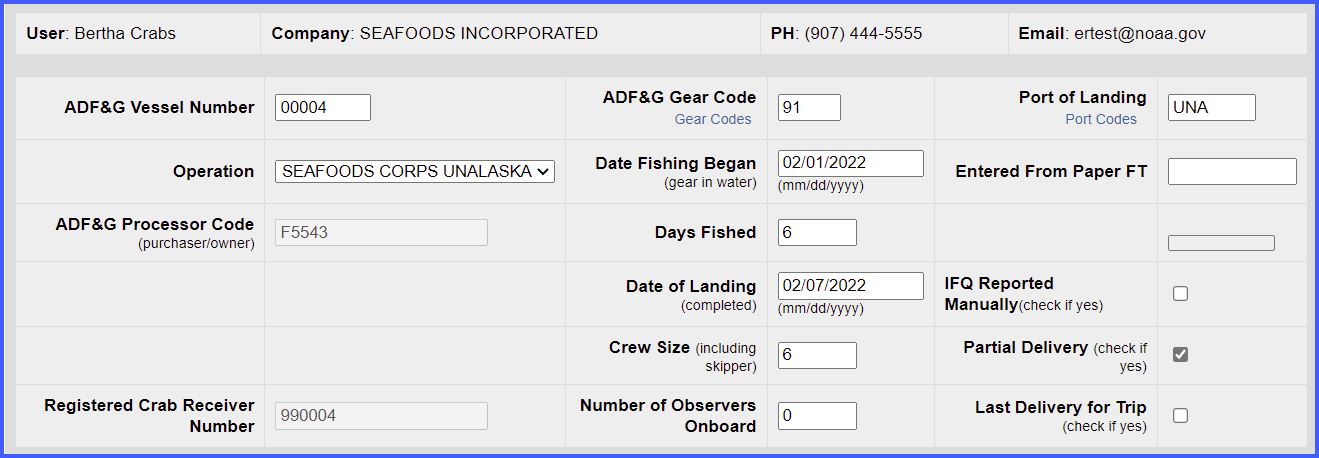
- The program will take you to the Vessel, Permit, and Location Information screen
- Enter the following:
- Vessel No: 00004
- Gear Code: 91
- Crew Size: enter a value
- Observers Onboard: enter a value
- Date fishing began: any day prior to today's date in 2020
- Days fished: enter a value .
- Date of landing: add the days fished and enter your date
- Partial Delivery: check the box
- Last Delivery of Trip: na
...

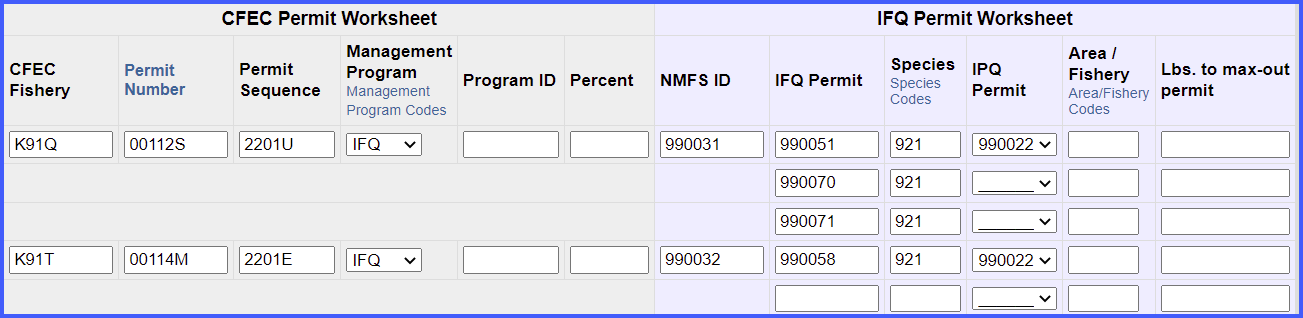
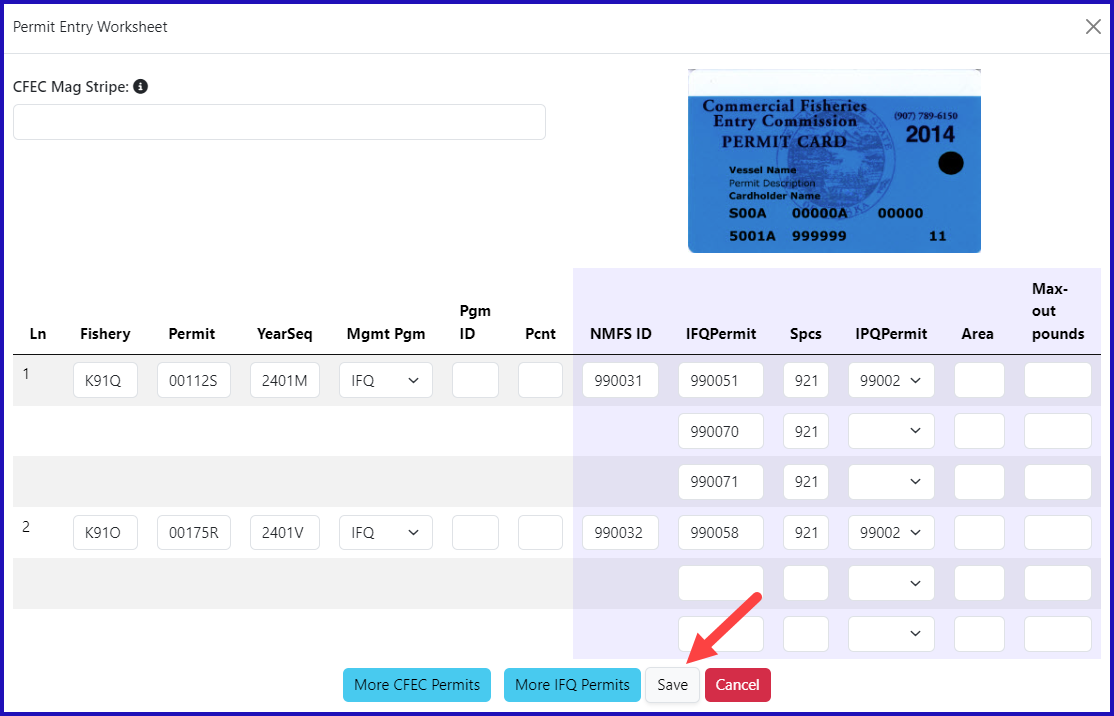
- Click on the Add/Edit button in the Permit Worksheet section

Next you will enter your permit information
...
| CFEC Fishery | Permit Number | Permit Sequence | Management Program |
|---|---|---|---|
| K91Q | 00112S | 2201U2401M | IFQ |
| K91TK91O | 00114M00175R | 2201E2401V | IFQ |
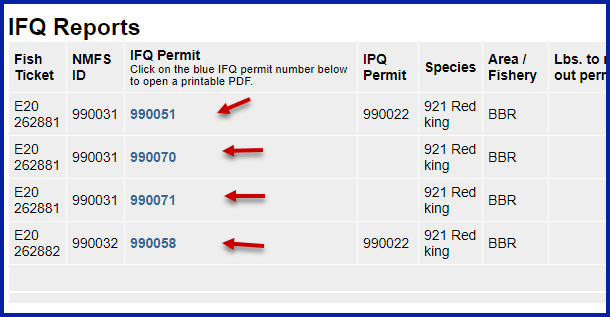
- Enter the IFQ permit information from the table below:
| NMFS ID | IFQ Permit | Species | IPQ Permit |
|---|---|---|---|
| 990031 | 990051 | 921 | 990022 |
| --------- | 990070 | 921 | ---------- |
| --------- | 990071 | 921 | ---------- |
| 990032 | 990058 | 921 | 990022 |
Enter the following stat areas but use your own percent and pot lifts:
| Stat Area | Percent | Pot Lifts |
|---|---|---|
| 615533 | -------- | -------- |
| 615534 | -------- | -------- |
| 615730 | -------- | ------- |
| 615831 | -------- | ------- |
| 615832 | ------- | ------- |
| 625532 | ------- | ------- |
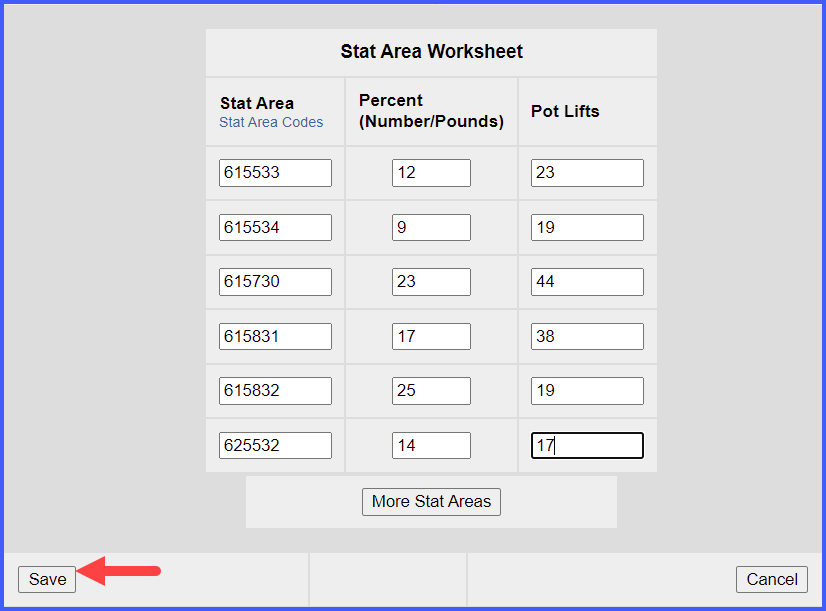
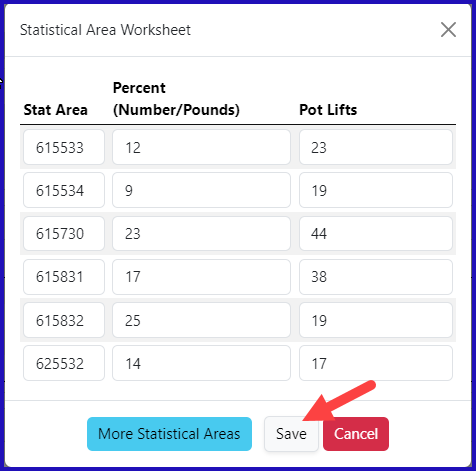
- Click on the Save button
Now you will be taken to the Crab Report Display Page
...
- Click on the Add/Edit button in the Itemized Catch buttonsection

- Add the following catch information:
| Species | Condition | Lbs. | Number | Disposition |
|---|---|---|---|---|
| 921 | 01 | 49000 | 5400 | 60 |
| 921 | 01 | 1600 | 173 | 79 |
| 921 | 01 | 150 | 21 | 95 |
NOTE: Since you already added your stat areas and pot lifts in the stat area worksheet, you don't have to enter them here.
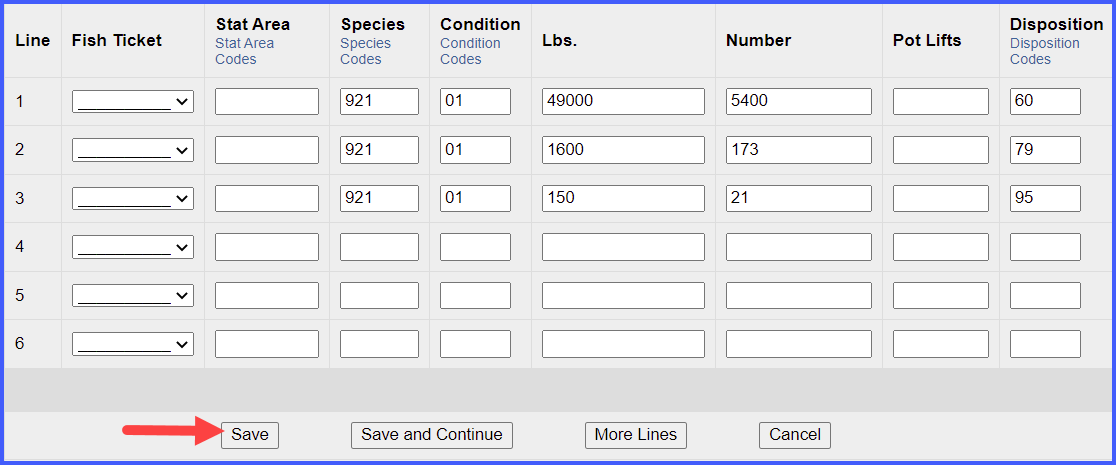
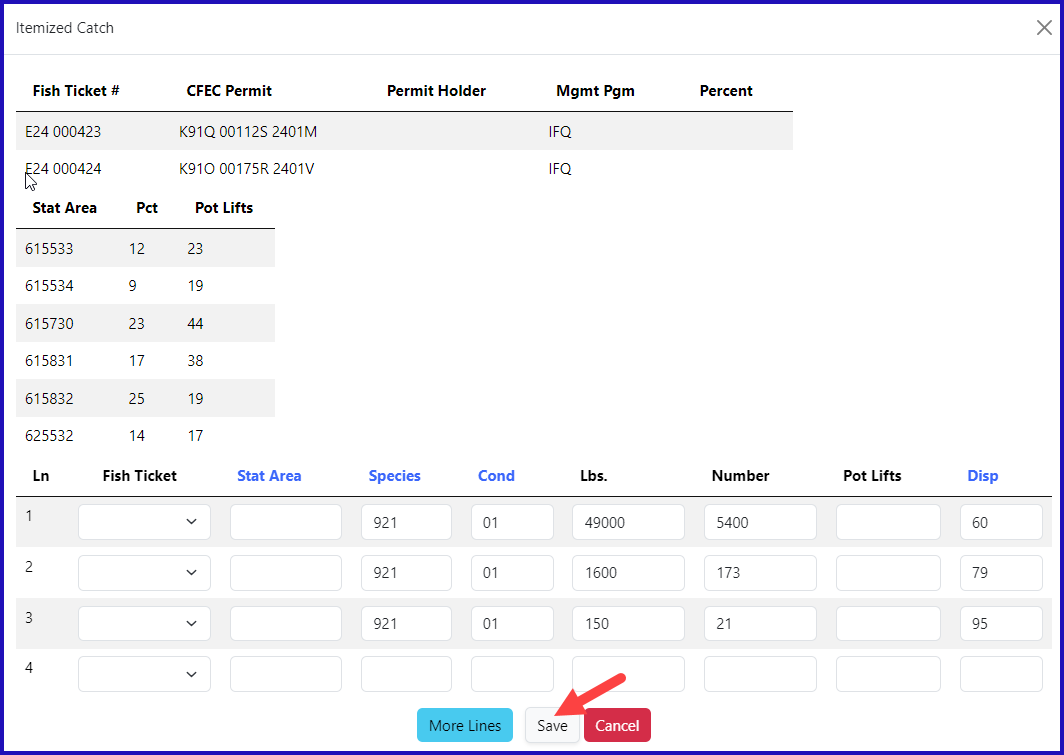
- Click on the Save button
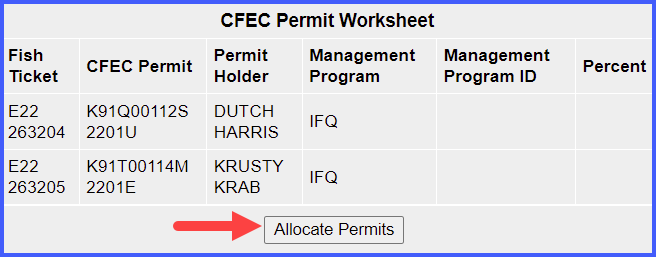
You will be returned to the Crab Report Display screen where you need to Allocate your permits to the fish tickets
- Click on the Allocate Permits button
 save the report at the bottom of the screen.

- From the dropdown menu select Allocate Catch to Permits

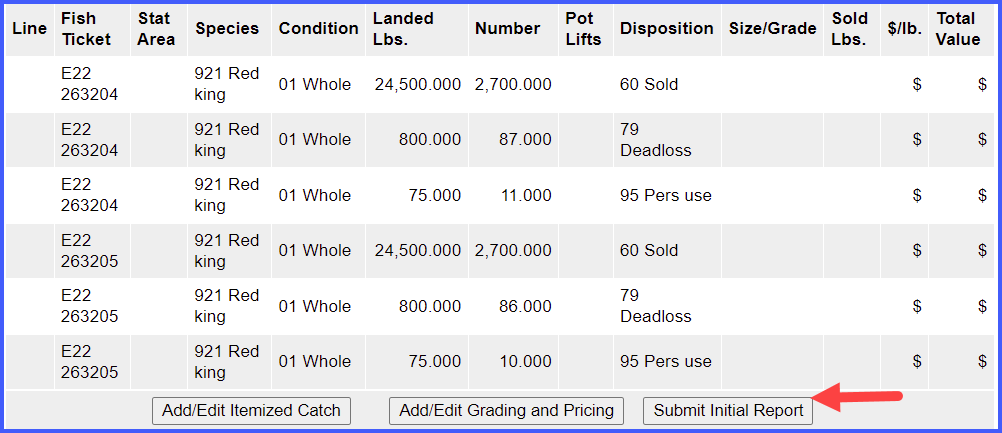
- If you want to modify the allocation of pounds to CFEC permit holders you can modify the pounds, or add an additional line of harvest on the line item and identify the specific fish ticket.
- You can also assign the personal use to one fish ticket at the line item level.
- Once you have documented the catch and allocated to permits, click on the select Submit Initial Report button.

- You have the option to reallocate the deadloss on the report but selecting the Reallocate Deadloss menu item.
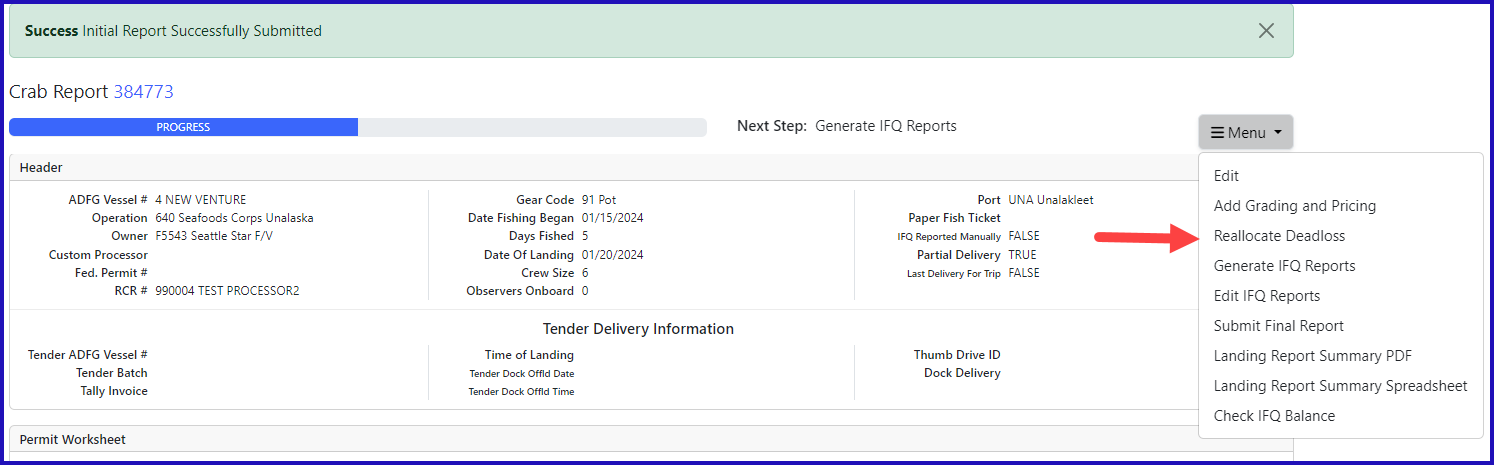
- The IFQ Report will open. Scroll to the bottom of the page screen and select the IFQ Report Builder click on the Reallocate Deadloss button.
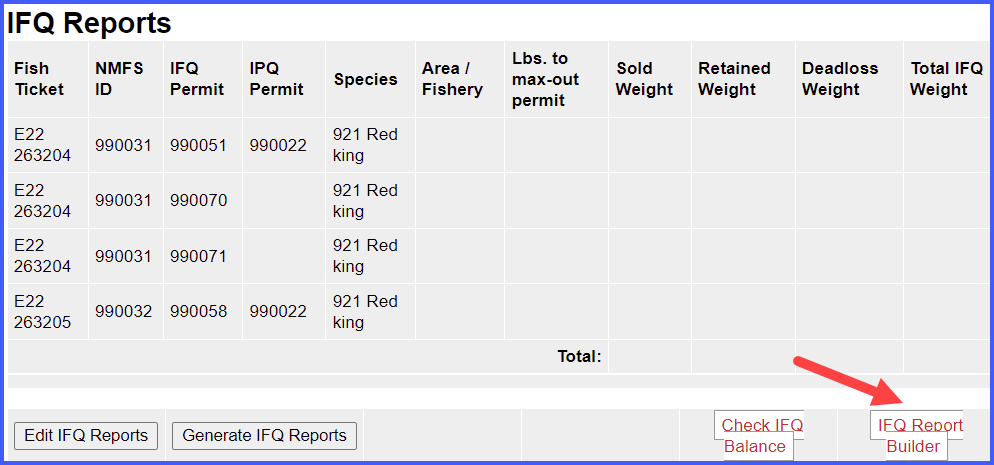
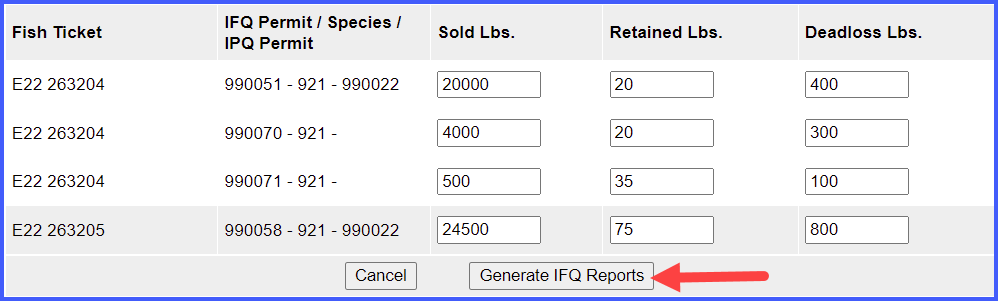
- The report builder allows you to assign sold, retained and deadloss pounds to specific share types. Each fish ticket must have poundage recorded.
- Add allocation of harvest to specific permits and generate the IFQ report.

- A window will open where you can select a specific fish ticket and stat area
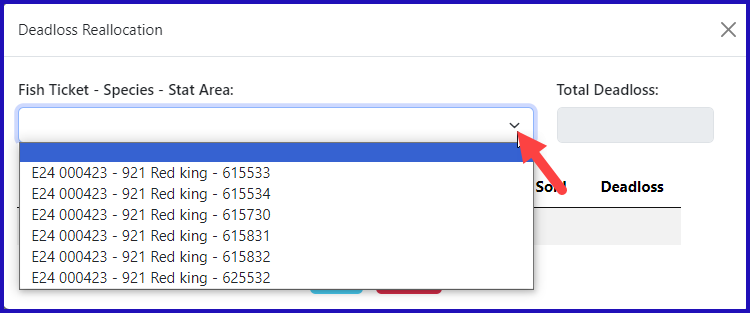
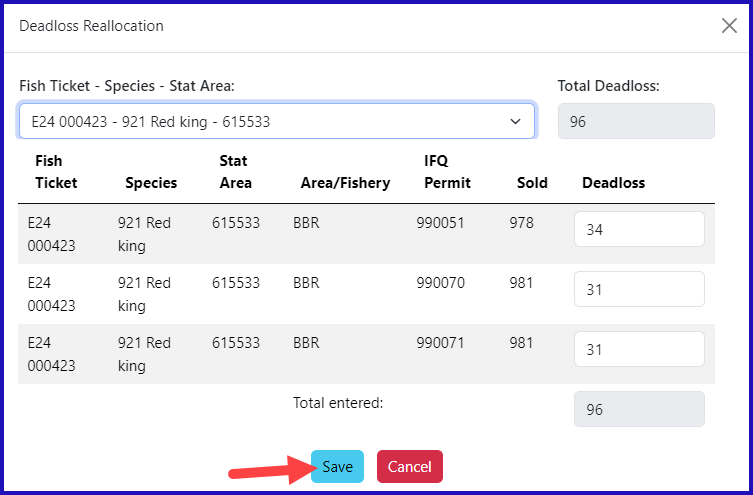
- After selecting the fish ticket and area you want to adjust the deadloss on it will populate all the rows of applicable catch
- Here you can make any changes and then click Save.
- If the IFQ report allocations look good, scroll to the bottom and click on the Save button
- From the Menu select Submit IFQ Report button
...
- Report
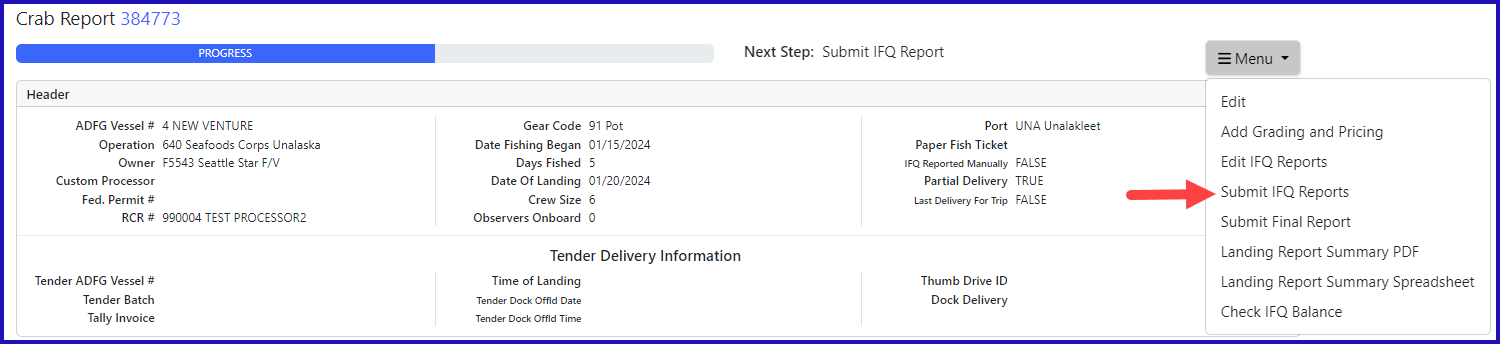
- From the Menu select Download IFQ Receipts to Print

- Print your fish tickets and the IFQ receipts.
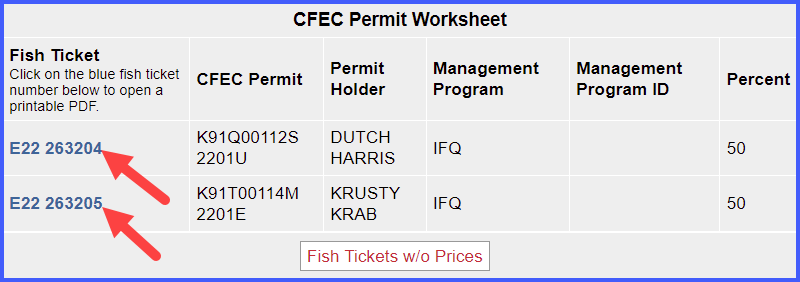
- by clicking on the blue fish ticket number in the Permit Worksheet section.

- From the menu select Submit Final Report

- Print your receipts

This completes the practice scenario.
...