eLandings User Manual
Longline CP - Entering sets, comments, and flow scale tests
In the right-hand section of the Logbook Dashboard screen, there are multiple options for actions.
- To begin with, select the current trip in the left hand column so that its highlighted in blue.
- The are several options in the right hand column that will become highlighted in a green box or with green text that point out the most likely options that you will need. These options are:
- New Trip Report – Creates a new trip
- Edit Trip Report – Allows you to edit the details of the trip you have selected in the left hand column
- Delete Trip Report – Deletes the trip that is selected in the left hand column.
- Complete Current Trip Report – Ends the trip selected in the left hand column
- New Daily Report – Entering a date, then clicking “New Day Trip Report” will open a new window that allows the user to enter sets/hauls, flowscale tests, deliveries, and comments.
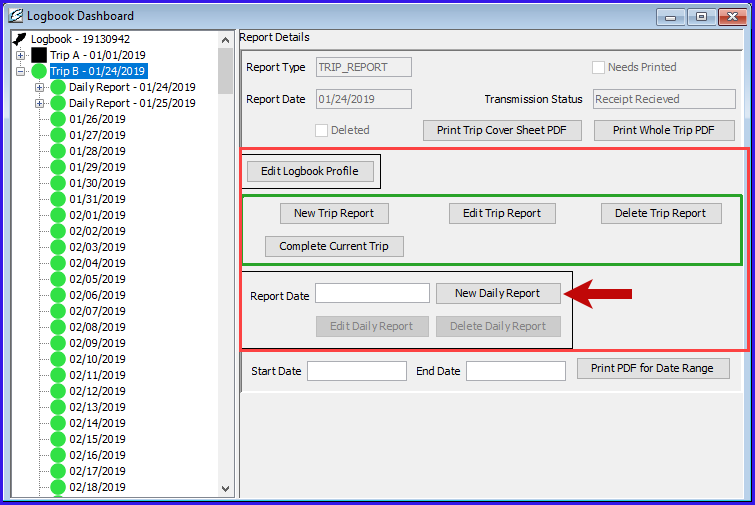
- We want to add set information for 1/26/20XX, in the Report Date field, I entered 01/26/20XX and clicked the "New Daily Report" button to begin that process.
- Another way to start a new daily report is to highlight the date in the tree and double click on it to automatically create the Daily Report.
- The Daily Report Set Window will open. To add a set, click “Add Set”
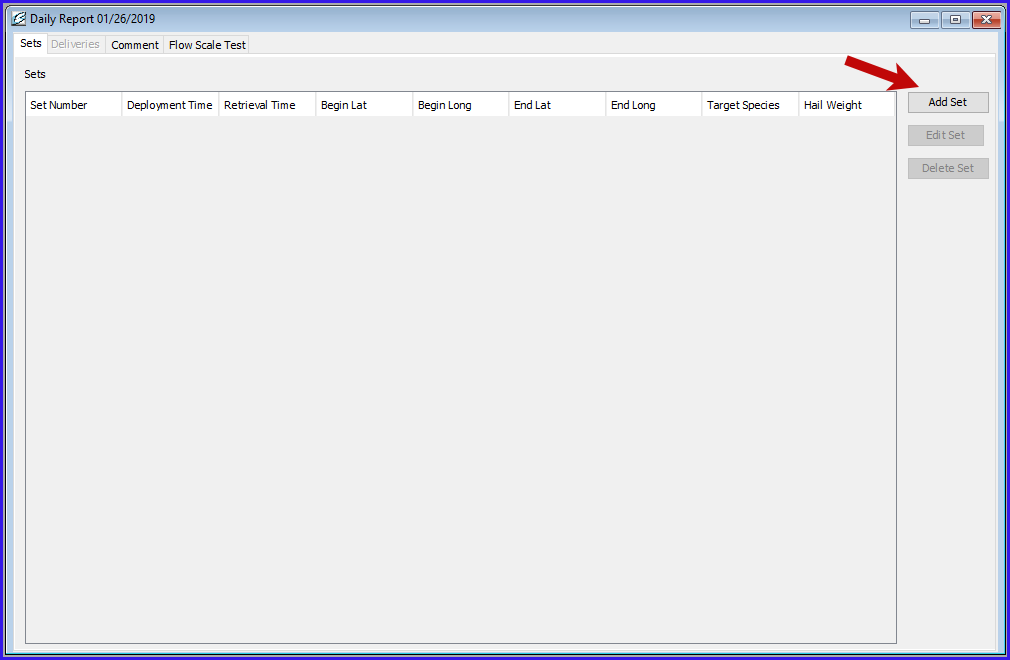
- Clicking “Add Set” opens up a new window where you are able to enter your set, retrieval and catch information.
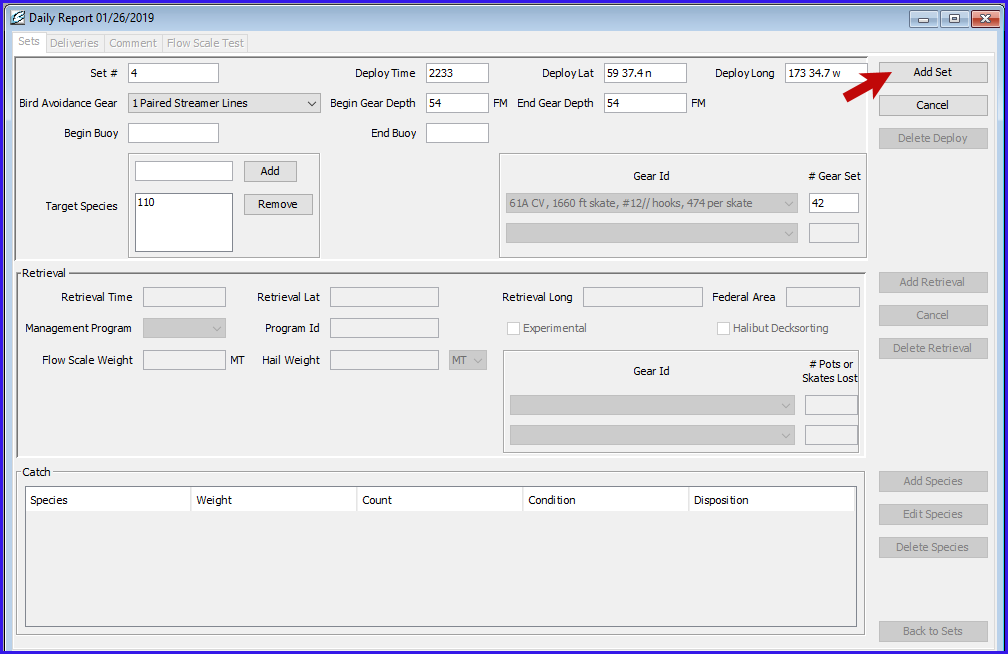
- First we add the set information. To enter the set data the fields that need to be filled in include:
- Set # - An automatically assigned number that identifies the set. It can be adjusted manually by entering in a new number into the field
- Deploy Time – The time that the gear first entered the water, recorded in military format
- Deploy Lat – The beginning position of latitude, (recorded to the nearest minute and denoted with a N or S) when the gear first enters the water.
- Deploy Long – The beginning position of longitude, (recorded to the nearest minute and denoted with an E or W) when the gear first enters the water.
- Bird Avoidance Gear – Using the dropdown menu select the option which matches the type of seabird avoidance gear which has been deployed.
- Beginning Gear Depth – The depth in either meters or fathoms at which the beginning of the gear set rests in the water
- Ending Gear Depth – The depth in either meters or fathoms at which the end of the gear set rests in the water
- Beginning Buoy – The number or marker on the buoy attached the beginning of the gear string. (optional, but may be required by IPHC regulations)
- End Buoy – The number or marker on the buoy attached at the end of the gear string. (optional, but may be required by IPHC regulations)
- Target Species – The species code of the intended species to be harvested. Enter only one target species code.
- Gear ID – From the dropdown select a gear profile that matches the gear used on the current set deployment. This field will default to the gear profile used on the previous set.
- # Gear Set – Number of gear set
- When you have entered all the information into the set, click “Add Set.”
- Now that the set information is saved, several new options for next steps are made available. You can “Edit Set,” “Delete Deploy,” “Add Retrieval,” or go “Back to Sets.”
- In this case, we are going to add the retrieval information, so we will click “Add Retrieval.”
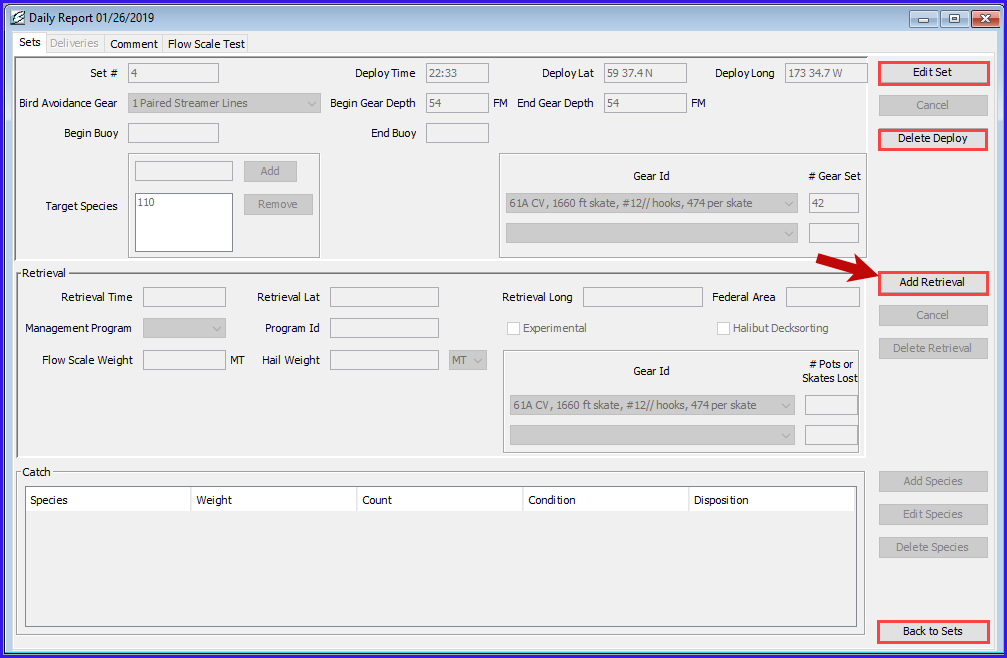
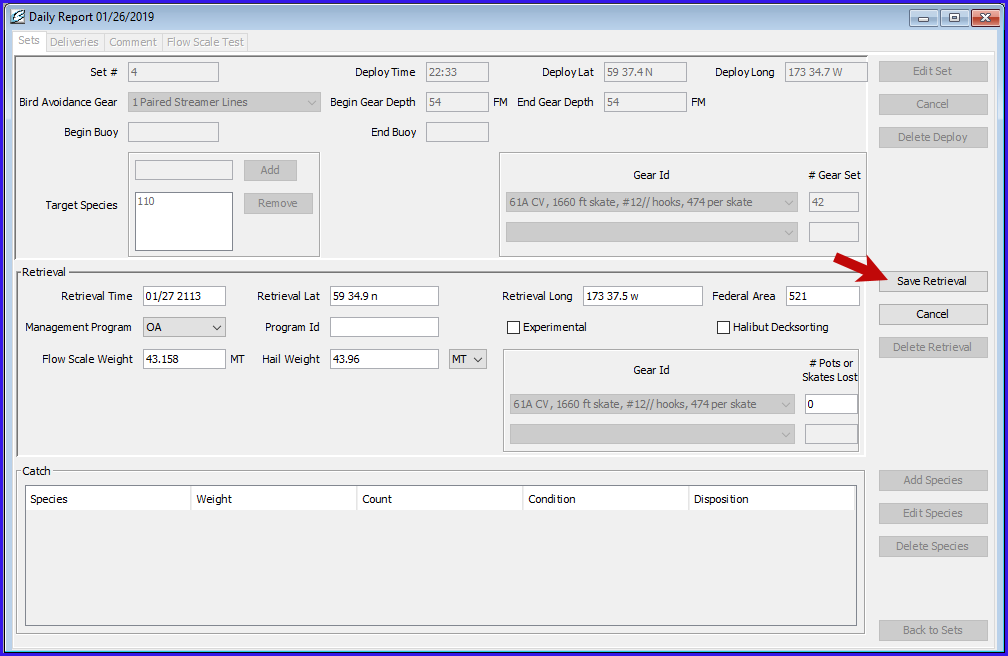
- Similar to adding the Set, adding the Retrieval, requires the logbook operator to enter in the set retrieval information including:
- Retrieval Time – The time that the last hook and line set leaves the water.
- Retrieval Lat – The ending position of latitude, (recorded to the nearest minute and denoted with a N or S) where the last piece of gear leaves the water
- Retrieval Long - The ending position of longitude, (recorded to the nearest minute and denoted with an E or W) where the last piece of gear leaves the water
- Federal Area – Automatically populates based on Lat and Long coordinates. The three digit federal area where fishing occurred.
- Management Program – The alphanumeric abbreviation for the fisheries management program that the fishing is occurring under. Use the Drop down to select the program.
- Management Program ID – Depending on the Management Program, an additional Management Program ID might be required. If so, enter that here.
- Halibut Deck Sorting – Check box if participating in the Decksorting EFP
- Flow Scale Weight – flow scale weight of catch
- Hail Weight – hail weight of catch
- Gear ID – the gear profile that matched the gear used for the set.
- Pots Lost – number of pots lost
- Once you have entered the required retrieval information, click “Save Retrieval.”
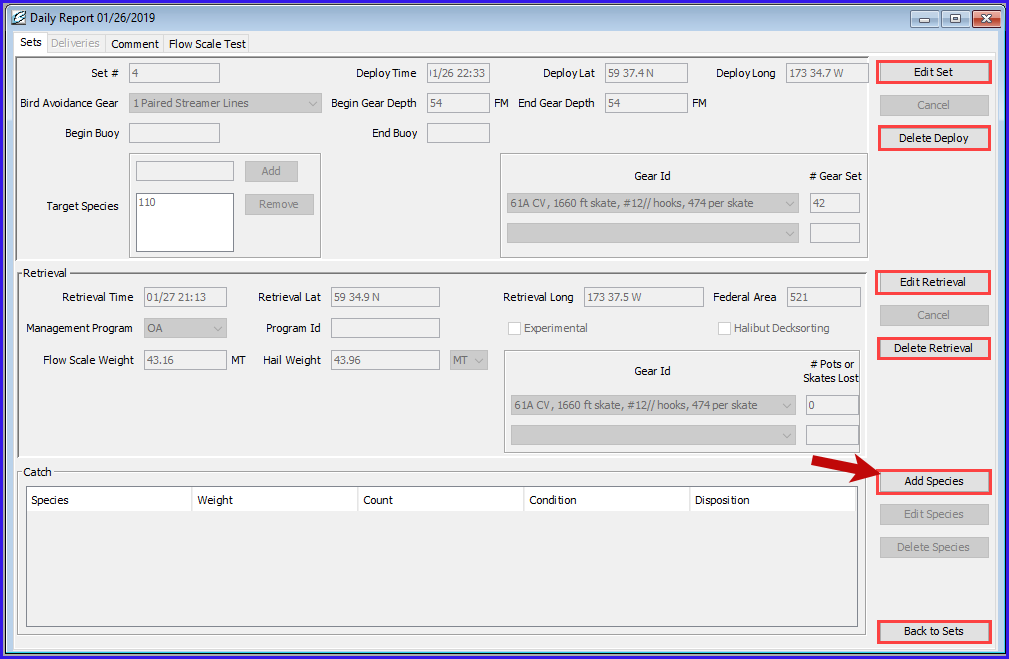
- When the retrieval is successfully saved, the right side of the Daily Report window will have multiple options, highlighted in red in the screen shot below.
- To finish recording our set, we still need to add the catch information. So to add the species catch information we need to click "Add Species."
Only IR/IU species, pollock, and Pacific Cod are required to be entered in the catch data. (Full accounting of the catch is required in the Production Reports.)
- Clicking "Add Species" will cause a window entitled “Add Species” to open. You can enter you catch data there.
- Enter the species code, weight and disposition. IR/IU species require the count to be entered instead of the weight. Condition code is optional.
- You can add more lines if necessary by clicking “Add More Catch.”
- If you do not need more lines and have entered your species catch data, finish by clicking “Save.”

- Once you have added the catch data, and clicked save, you will return to the Daily Report window, where you can edit or delete your set, retrieval, or catch information.
- If you are finished entering the set you can return to the “Sets” window by clicking “Back to Sets.”

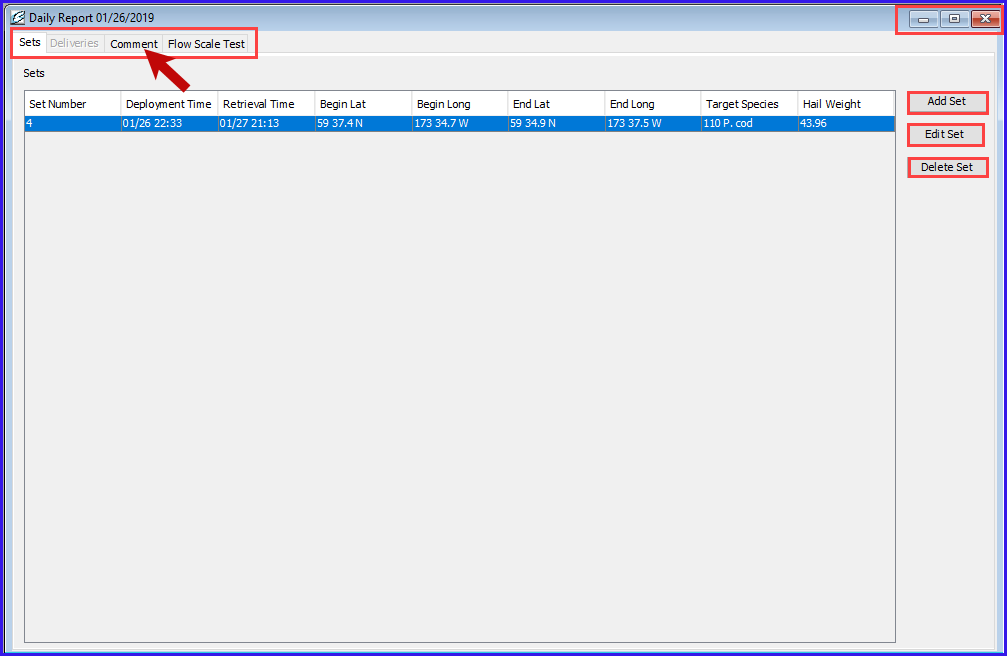
- Clicking "Back to Sets" will return you to the Daily Report Set screen.
- From the Daily Report Sets screen you can several things:
- Add another set
- Edit or Delete a set you have already entered. You can do this by clicking on it, then choose the “Edit Set,” or “Delete Set” option.
- Use the tabs at the top left of the window to add a comment, add a flow scale test, or add a delivery if the vessel is acting as a Mothership.
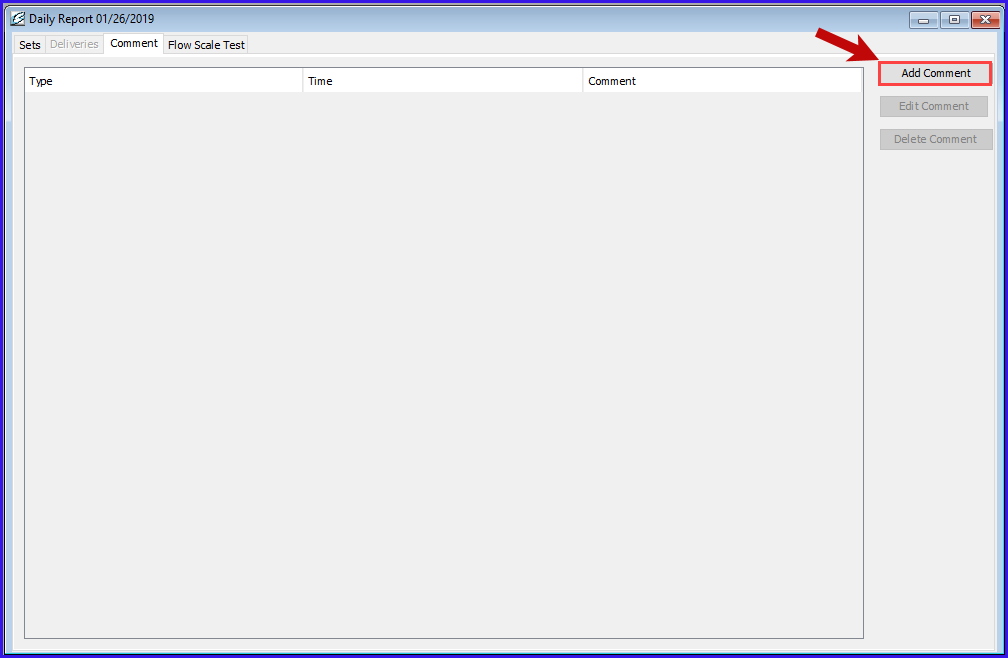
- Let’s look at adding a comment. To do this, click on the Comment tab on the top left of the Daily Reports Sets window.
- Once you have navigated to the comment tab, you can add a comment by clicking “Add Comment.”
- There are two type of comment, a general comment, or the “Moved to Avoid Salmon” comment.
- If you choose the “Moved to Avoid Salmon” comment, the program will take note of the time and date as the full comment.
- To add notes or text, choose the “General Comment” option.
- Character space is limited to 140 characters, so long comments may result in needing to make several comments.
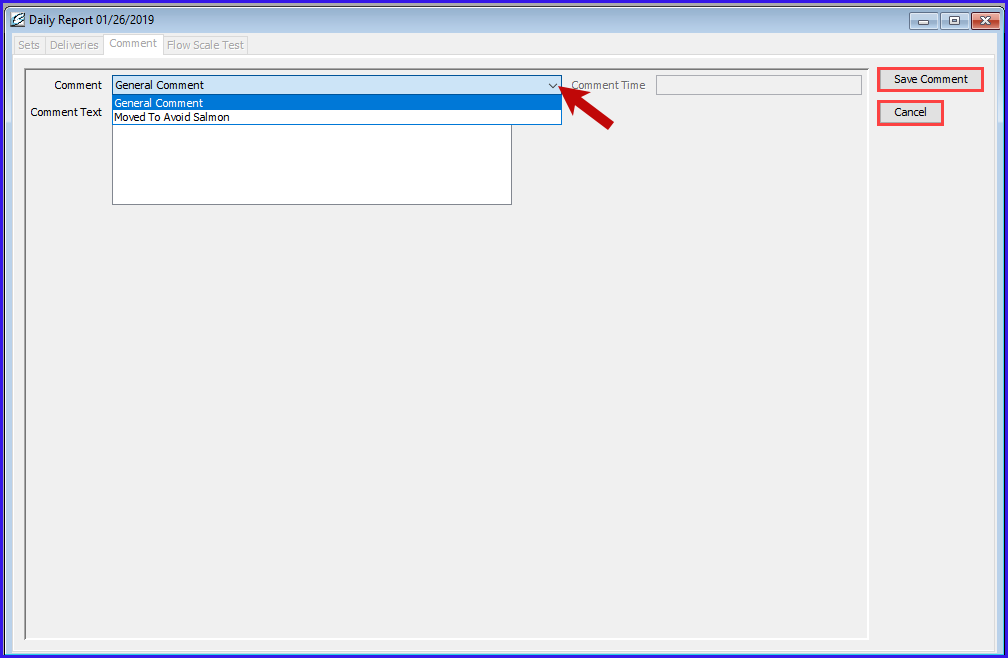
- Once you are done, click “Save Comment.”
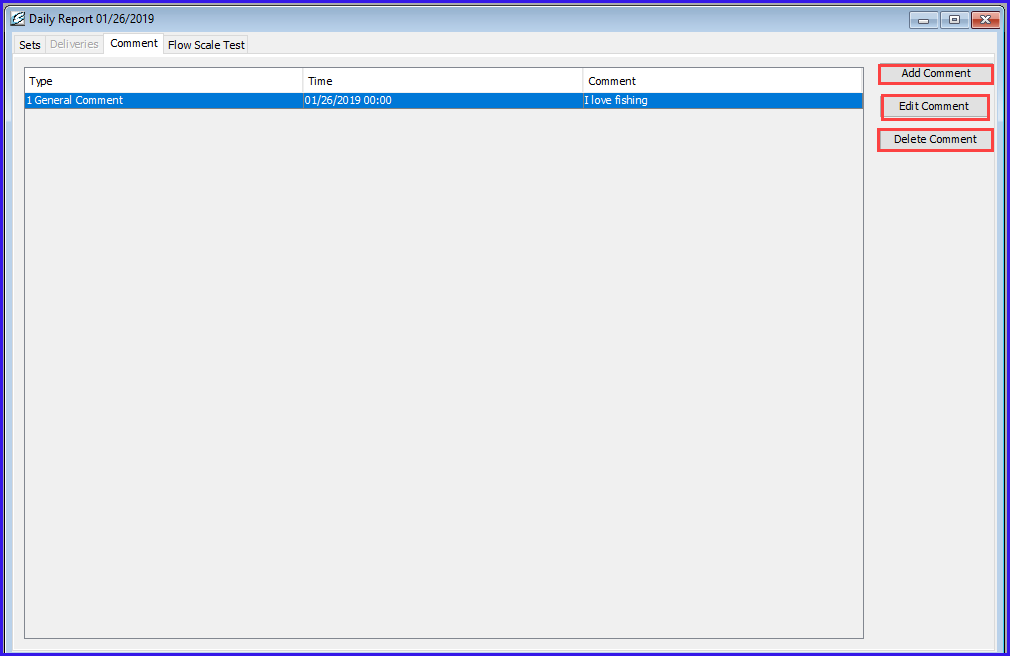
- Once the comment is saved, you can edit or delete it at any time, if the comment has already been transmitted though, it will stay in the logbook and show that it was deleted by having a strike through throughout the deleted text.
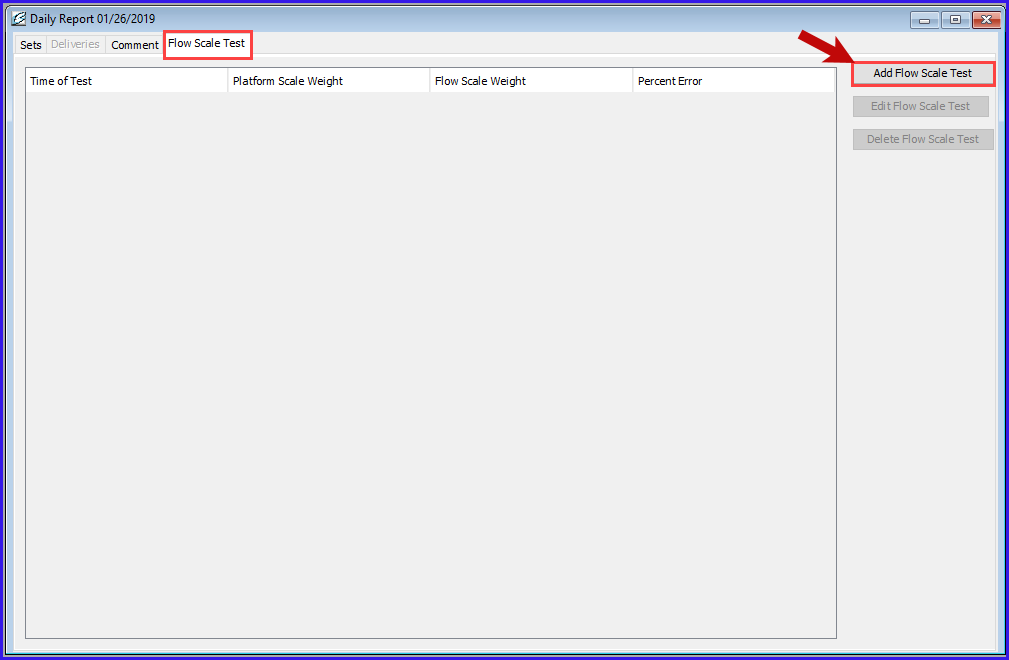
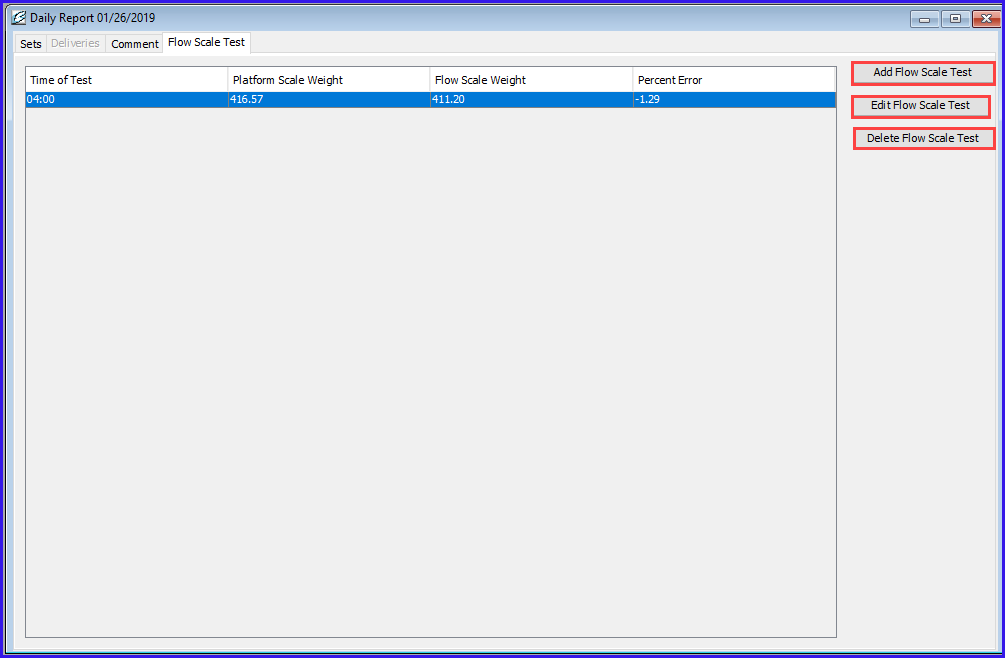
- To add a flow scale test, navigate to the Flow Scale Tab on the top left of the window, then click “Add Flow Scale Test.”
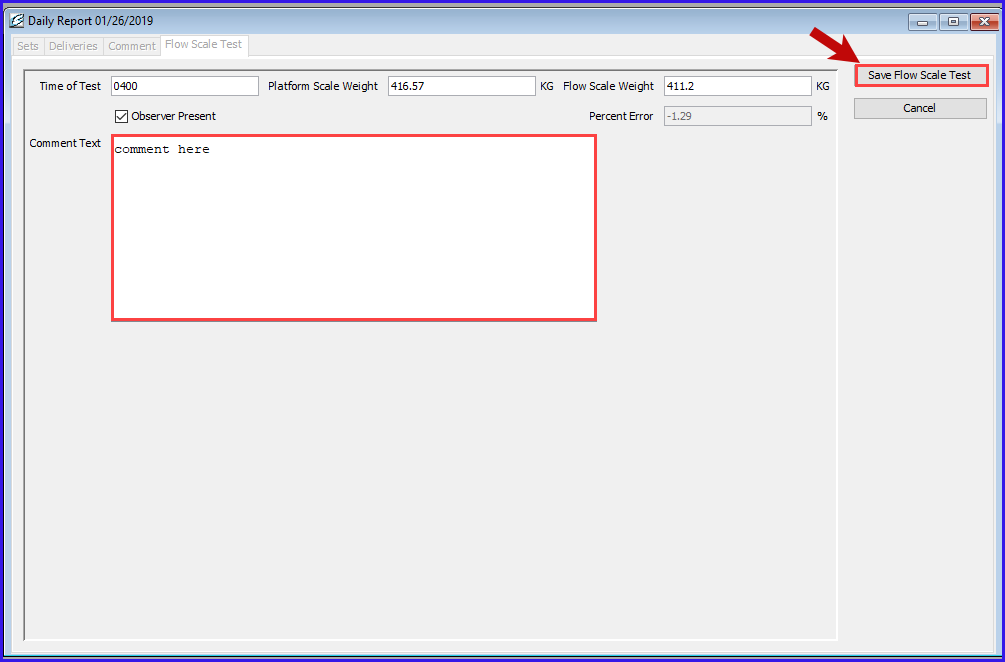
- You can enter the time of the test, platform scale weight, flow scale weight, and check the box if an observer was present.
- The percent error will calculate automatically based on the platform scale weight and the flow scale weight.
- Add any comments that you wish to make
- Click “Save Flow Scale Test” to finish
- Once you have saved the Flow scale test, you will return to the previous screen where you can then add another flow scale test, edit the existing test, delete a test, or use the tabs at the top right of the window to continue to navigate elsewhere.
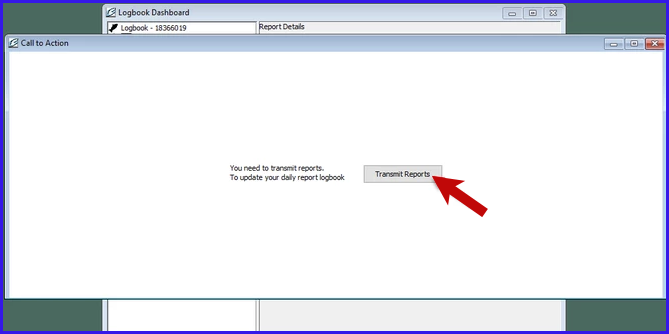
- If we exit out of the Daily Report window, we can see the logbook dashboard, and behind that, the Call to Action window.
- Clicking on the Call to Action window, you can see that its still prompting you onto the next step, in this case, transmitting the newly created reports.
- By clicking Transmit reports, we can begin the process.
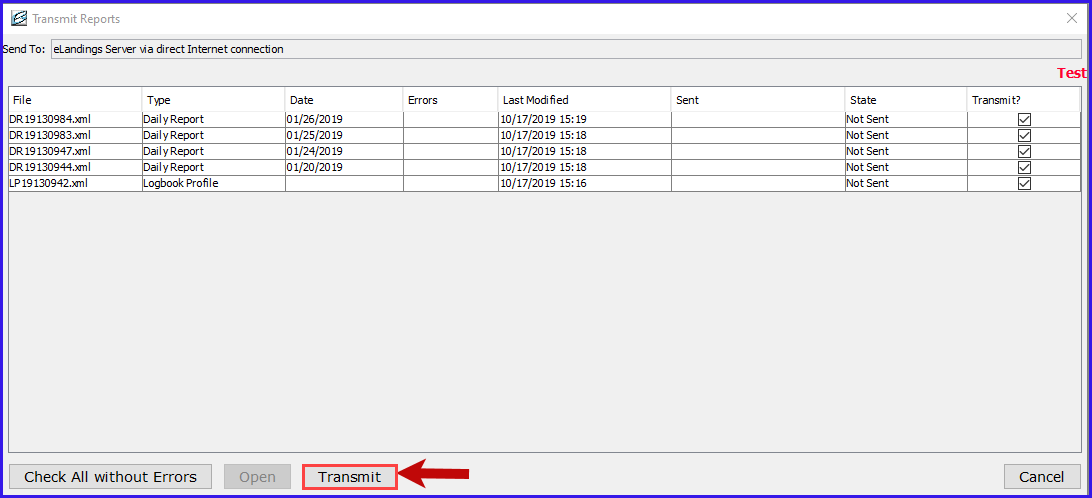
- The Transmit Reports window will open.
- Click Transmit to continue.
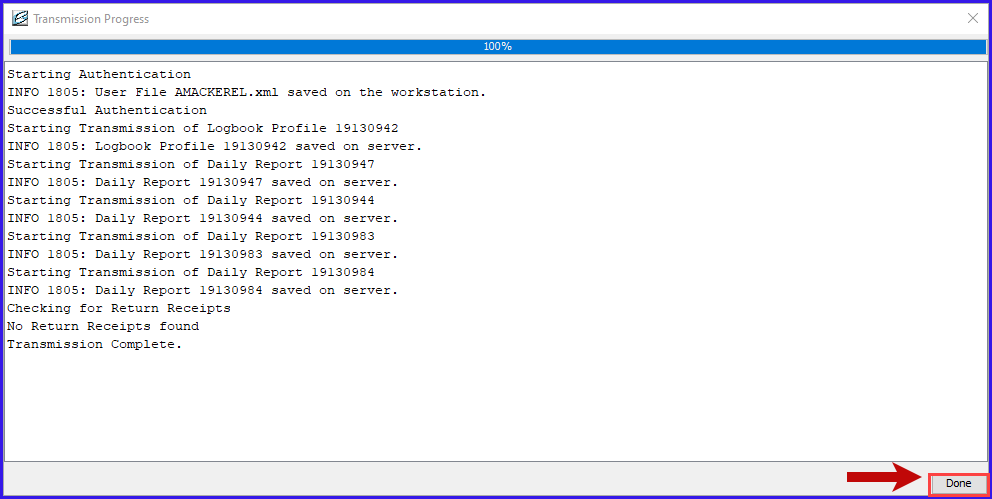
- The transmission will send and you will see the progress of the transmission and notification that the reports have been submitted successfully.
- Repeat the process to add more sets, comments or flow scale tests as needed.
To download a copy of there instruction click the link below.
Longline Entering sets, comments, and flow scale tests.doc