eLandings User Manual
PTI Scenario 2-Import Landing Reports from PTI to eLandings
PTI Scenario 2: Import Landing Reports to eLandings
User ID: sfish
Password: sockeye1
To complete this exercise you will need to use a thumb drive that was used in TWS Scenario 1 for the tender Royal Pacific, as you need saved reports to upload. You should also have the PTI training application downloaded and available on the machine you will use with this exercise. During the installation processes, you are prompted to select which type of installation. To use the tLandings training environment, you will need to install the Training version. The Production version is what is used for real reporting. You can use the same file you downloaded for Production installation to install the Training version. You don't need to download that file again. The latest version of the PTI is available here: 2024 PTI Download Instructions

Scenario
For this scenario, you are the fish ticket processing staff for King Crab Processing. You have just received a packet from a tender operator containing signed copies of the fish tickets and a thumb drive with some landing reports recorded on it, and a signed copy of the fish ticket for each landing. You will import the landing reports from the thumb drive using the PTI into the eLandings database and verify their existence using the eLandings web interface.
Before you begin the process of uploading the fish ticket data you will want to review the eTickets copies to make certain they are signed and if the magstripe read is not checked (an empty box) the CFEC permit card was embossed. If dual fishing, did both permit holders sign the fish ticket.
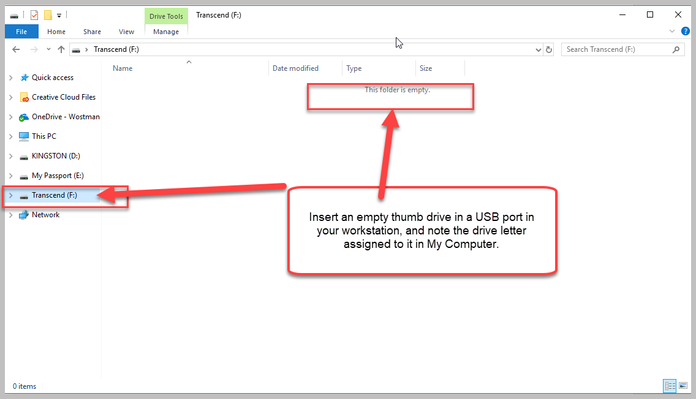
Insert the thumb drive in a USB port, and note the drive letter assigned to it using My Computer or other file Explorer window.
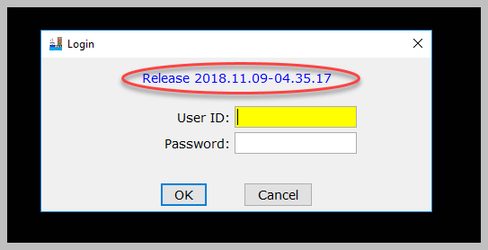
On the Login screen enter userID sfish and password sockeye1, and click the OK button.
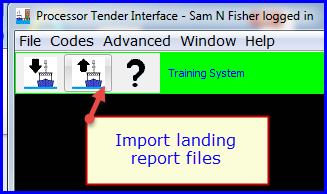
When logged in, click the “Import landing report files” button, middle of upper left corner grouping.
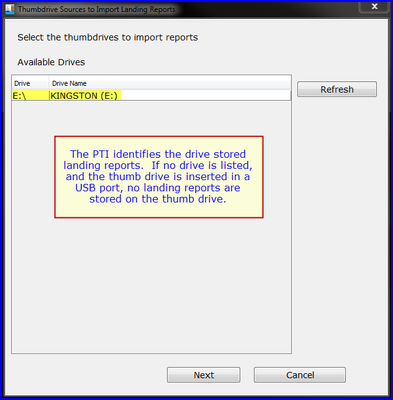
The PTI will scan all drives on or connected to your computer, and if it finds landing reports on any drives, will display a list of Available Drives. Select the drive letter of the thumb drive you inserted earlier, and click the NEXT button.
This starts the import process, and a progress bar will display briefly while files on the thumb drive are copied and opened.
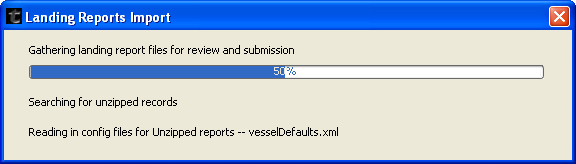
When done, a list of landing reports will display. Note whether there are any landing reports with errors or whether any reports are not selected with a green check mark in the Select column. Incomplete Landing reports with errors cannot be imported into eLandings until they are edited and corrected.
If there are errors, the unique landing report is identified. You can open the landing report and determine the problem or use the Display Messages button to diagnose the problem. The goal is to upload all landing reports successfully.

To correct any landing reports with errors, simply click on the record line to highlight the record. The Open button below the landing report table will activate and allow you to open the record.

The fish ticket landing report opens in the tLandings application. If you click on save, the application will indicate the problem with the report and allow correction. Always remember to save. If needed, you can re-print the fish ticket and then import all records.
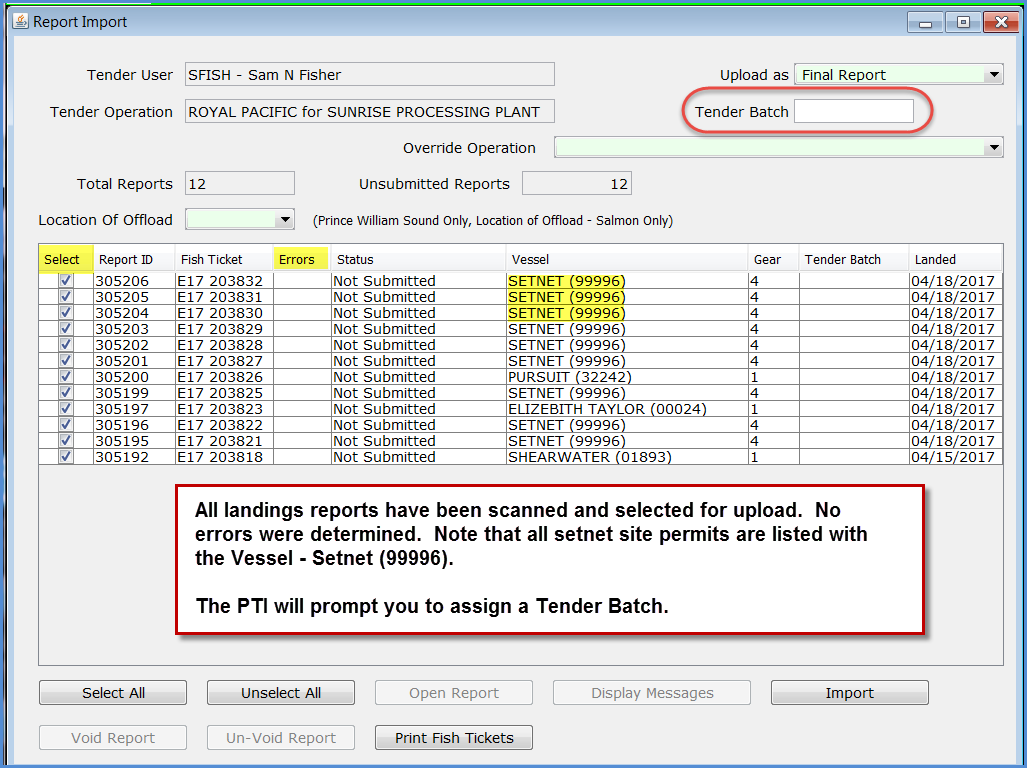
Note the 3 numbered controls in the Report Import dialog.

I want to review each field individually.
- If the landing reports have been reviewed and are accurate (correct dates/statareas/species and pounds) and if they do not contain any interim CFEC permit values, you can and should upload the reports as FINAL REPORTS, the default.
- If the reports contain Mixed Salmon species codes (460) or interim values, they cannot be uploaded as Final Reports. Choose, Upload as Initial Report. These reports will be finalized with the Mixed Salmon update.If you attempt to upload reports that contain species code 460 or interim values, the PTI will generate error messages to that effect if not changed to Interim Report before importing.
- The Tender Batch is a unique assignment provided by the processor to identify the tender’s off-load to the seafood processor. This field is alpha/numeric - 15 characters. We recommend you include the year. The tender batch assignment allows you to search by the tender batch for all landing reports for that off-load. It is important to realize that you will need to keep track of your own batch number assignments.
- If you have sister facilities owned by the same company and the thumb drive was configured by another one of your plants, with a different processor license (F-Code) and port, you can override the Plant name/F-code/Port from the dropdown list. This feature only works if you have shared user accounts. This feature can also be used in partnered operations that share tenders. This feature is helpful at the end of the season when you need to generate the Commercial Operator’s Report – the COAR.
If no landing reports need correction, click the IMPORT button to start the process.
When the Batch Number dialog pops up, click Yes to continue without entering a number:

The program will display a progress bar while the files are importing into eLandings, and display messages for any errors detected during import.

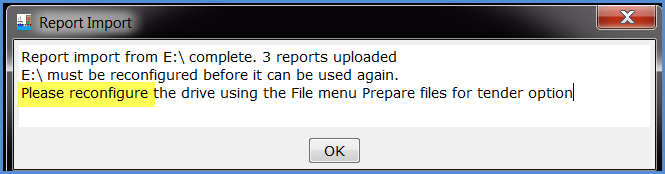
When complete, the program displays counts of reports submitted and the USB drive. This dialog box also reminds you to please reconfigure the thumb drive, choosing the PTI down arrow to add additional numbers. Click the OK button.
View the Landing Reports in eLandings
Once landing reports are imported, they can be viewed in eLandings to confirm the import or to edit for correction. Open an internet browser to eLandings TRAINING.
https://elandingst.alaska.gov/web/

Enter User ID sfish and password sockeye1:
Once logged in, eLandings opens to the Reports Menu page. Click on the Reports drop down and select Landing Reports to go to the Landing Report Search page.

Enter an appropriate range of dates for the landing reports you just imported (or otherwise filter for them using the Search criteria boxes or drop downs), and click the SEARCH button. Don't click the top report button at the top to create a new report. You want to search for existing reports you have uploaded.

You can use any of these fields to search for a single or a group of fish ticket reports. We suggest the fastest method to locate records uploaded from a single thumb drive upload is to use the Tender Batch as the search criteria.
Your results will be listed at the bottom of the page. Glance through the search results to confirm the existence of your imported landings.

You can open the individual landing reports by clicking on the blue Report ID number for each report, if you want to see all the details.
Good job.
Let’s just review the entire PTI – tLandings process:
Seafood office ~
- Establish operation and user accounts in eLandings.
- Download Processor Tender Interface.
- Establish Configuration Defaults and Settings, Tenders and Species Defaults.
- Configure thumb drives for each tender, label and distribute.
On-Board Tender ~
- Record landings within tLandings application.
- Obtain signatures for each landing.
- When the tender trip is completed, return the used thumbdrive and signed fish tickets to the Seafood office.
Seafood office ~
- Make certain all signed fish tickets are present.
- Upload fish tickets using the PTI.
Extract data to your own business application.