Getting Started
Go to:
...
https://elandingst.alaska.gov/
...
web
Enter the following user ID and password:
...
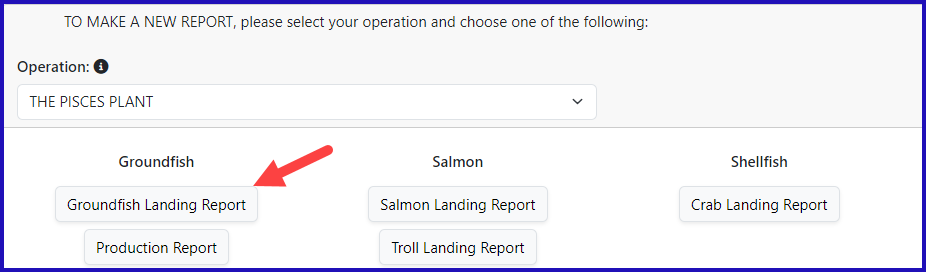
- On the main reports page click on the Groundfish landing report button
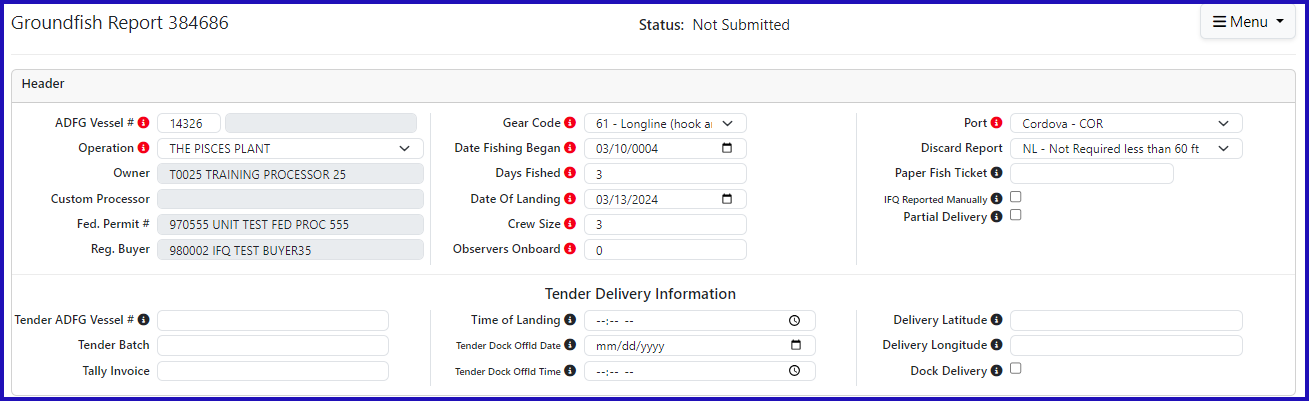
Enter the following header information (fishing dates can be different than what is shown):
...
| ADF&G # | Gear Code | Crew Size | # of Observers | Date Fishing Began | Days Fished | Date of Landing |
|---|---|---|---|---|---|---|
| 14326 | 61 | 3 | 0 | 03/xx/20202024 | 3 | 03/xx/20202024 |
- Permit Information
- When using the max-out pounds feature, you will need to have two separate permits for the same Area/Fishery
| CFEC Permits | Management Program | Program ID | NMFS ID | IFQ Permit | Species | Area/Fishery | Lbs. to Max-out IFQ Permit |
|---|
| B61B 00101U 2401A | IFQ | 980038 | 980001 | 200 | 4D | n/a | |
| 980003 | 200 | 4D | 300 |
| B61B 00104W 2401N | CDQ | 52 | 980039 | 980005 | 200 | 4D | 800 |
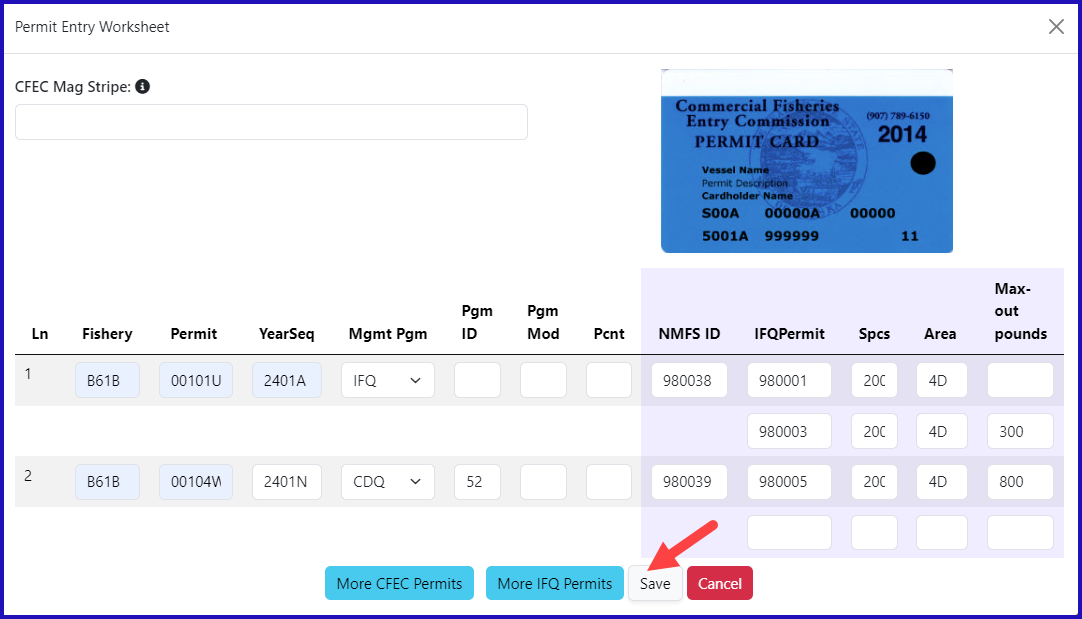
Statistical Areas:
...
Stat Area | Percent |
|---|---|
686431 | 65% |
686400 | 35% |

...
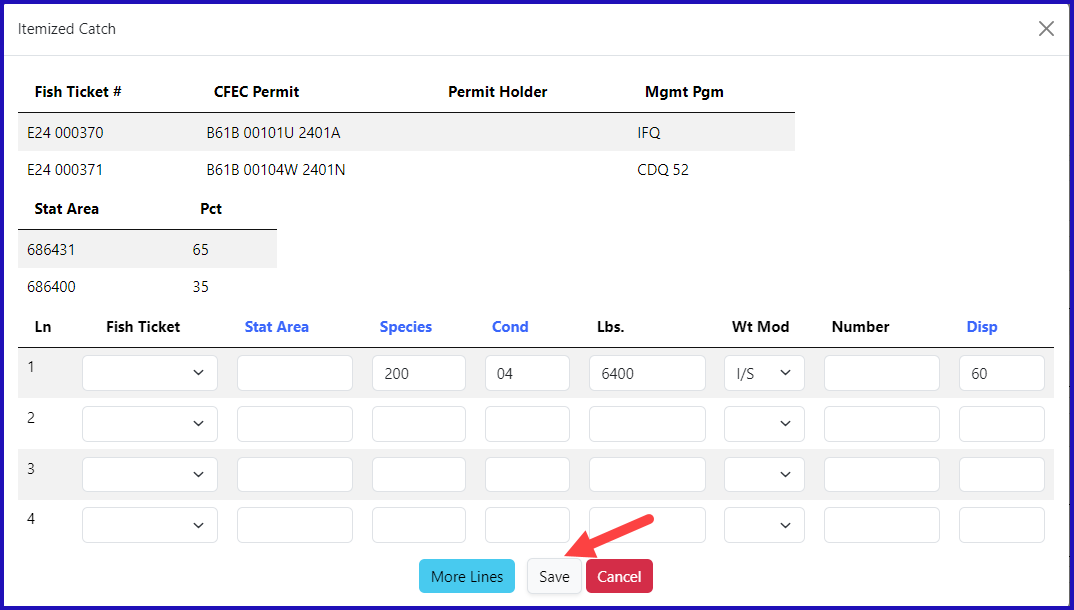
Adding Catch Information
- Click on the Add/Edit Itemized Catch button

- Enter pounds landed and click on Save.
- The eLandings system will allocate the IFQ pounds accordingly in the next step.
...
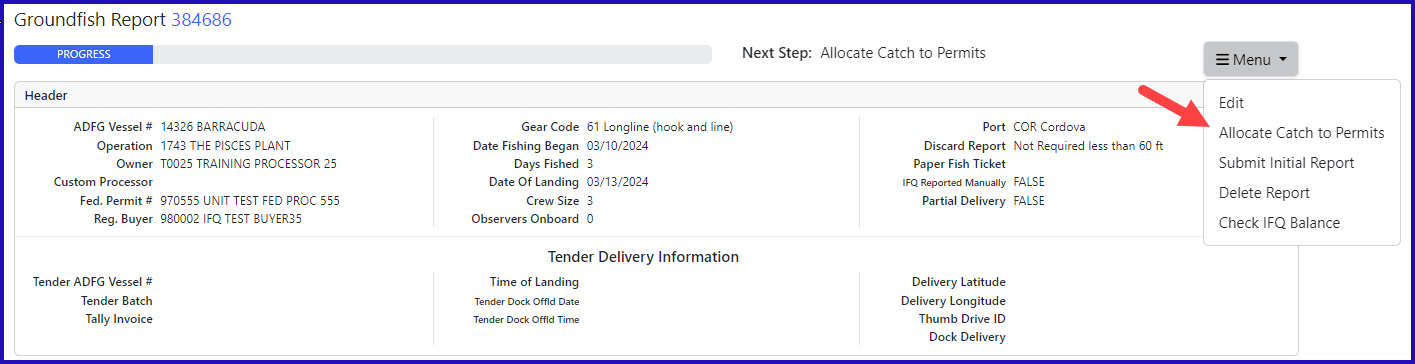
- On the main reports page in the CFEC Permit Worksheet box, click on the Allocate Permits button
| Species | Condition | Pounds | Weight Modifier | Disposition |
|---|---|---|---|---|
| 200 | 04 | 6400 | with Ice and Slime | 60 |
- Select Allocate Permits from the dropdown menu, this will allocate pounds and permits to fish tickets.
...
IFQ Reports
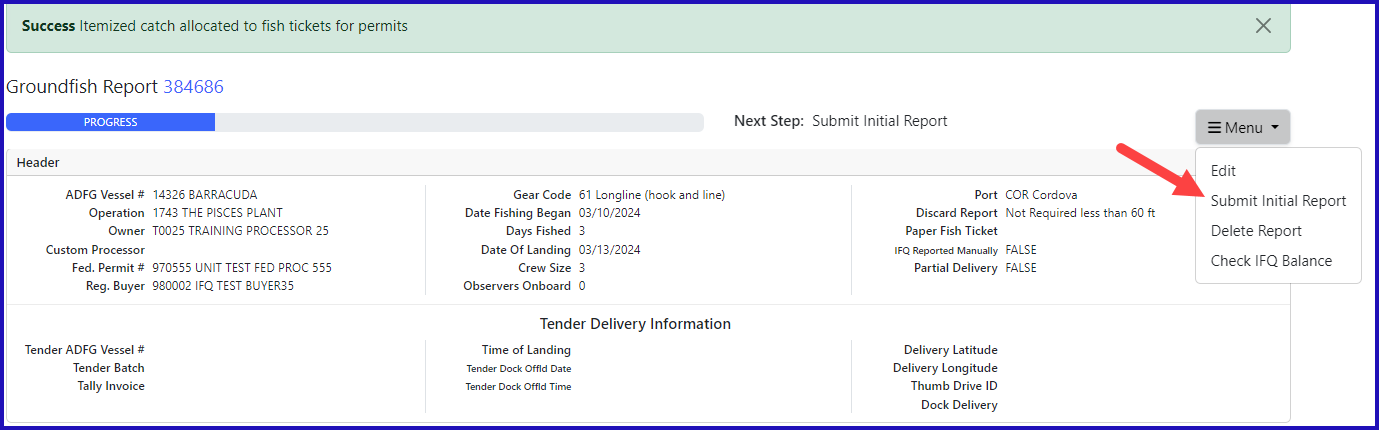
- Before you can generate your IFQ reports you need to click on the Submit Initial Report button.
- Now you can Generate IFQ Reports.
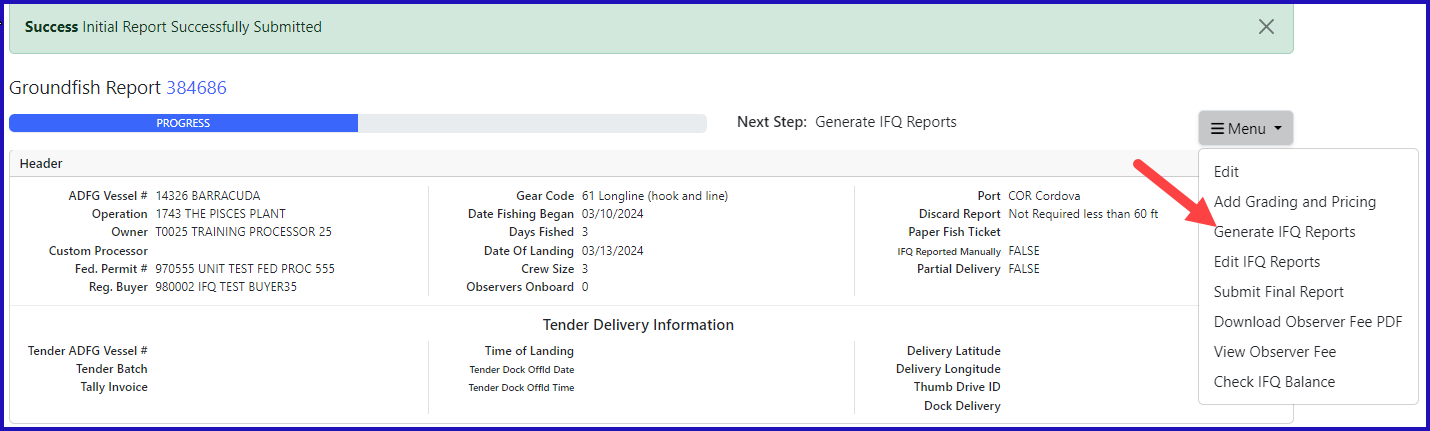
- You will receive a message that your IFQ reports have successfully been generated.
...
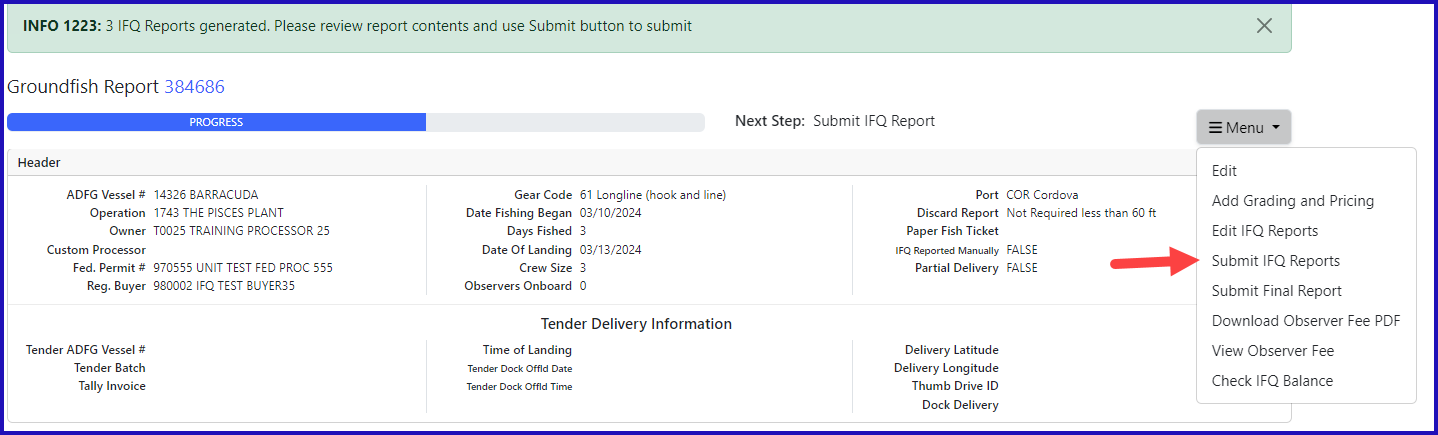
- Verify that all of the information in the IFQ report is correct, specifically that the max-out pounds were allocated as desired.
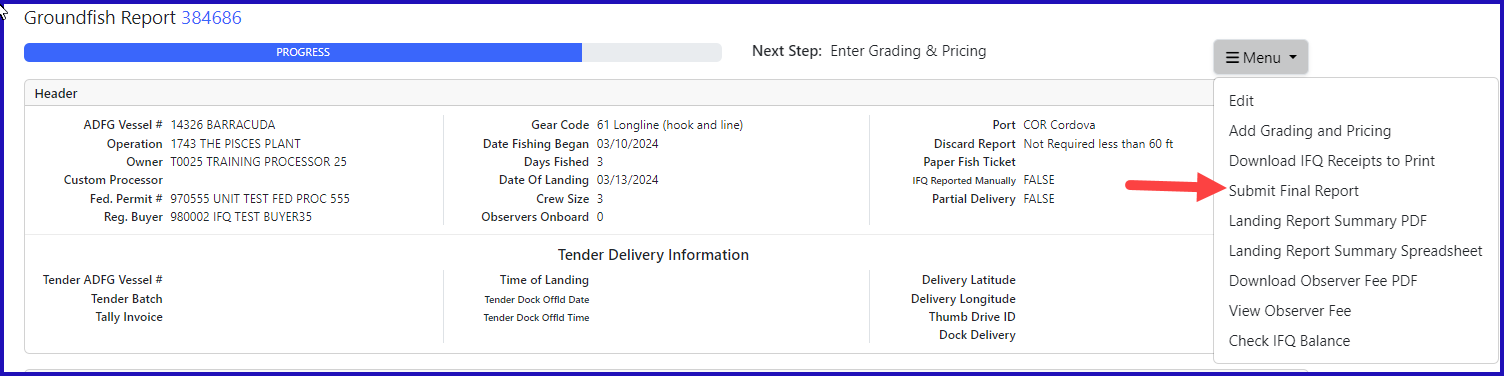
- Click on the Submit Select Submit IFQ Reports button from the dropdown menu.
At this point you can add your grading and pricing information. Once you're done with that part of the report you will need to
...
select Submit Final
...
Report from the dropdown menu.
...
Just a few more things to do and your reporting process will be complete!
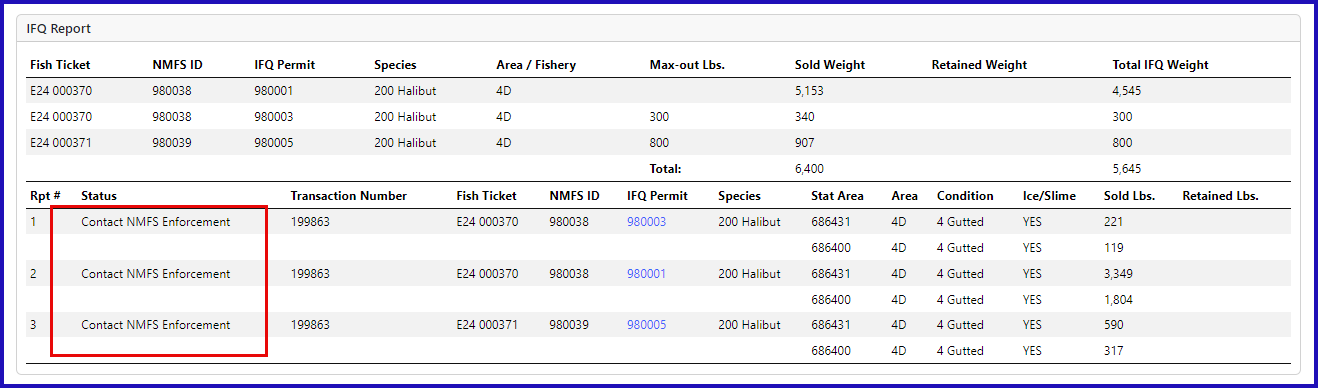
1) Print the landing receipt - this will only work if you submitted your IFQ report!
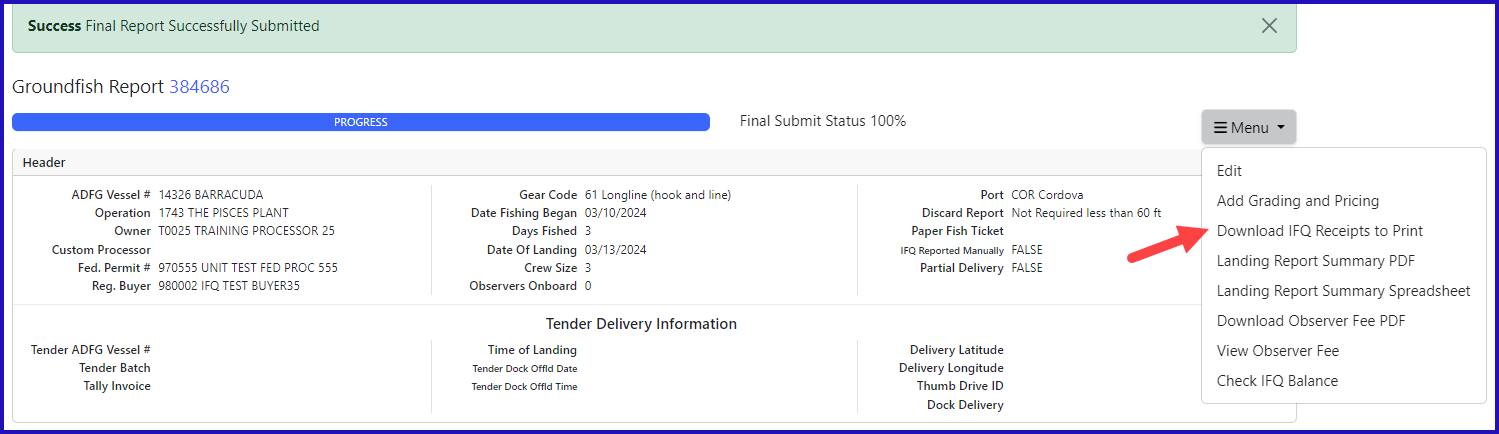
Note: You will ALWAYS receive a "Contact NMFS EnfEnforcement" in the training scenarios because of the PNOL requirements
2) Print your fish tickets
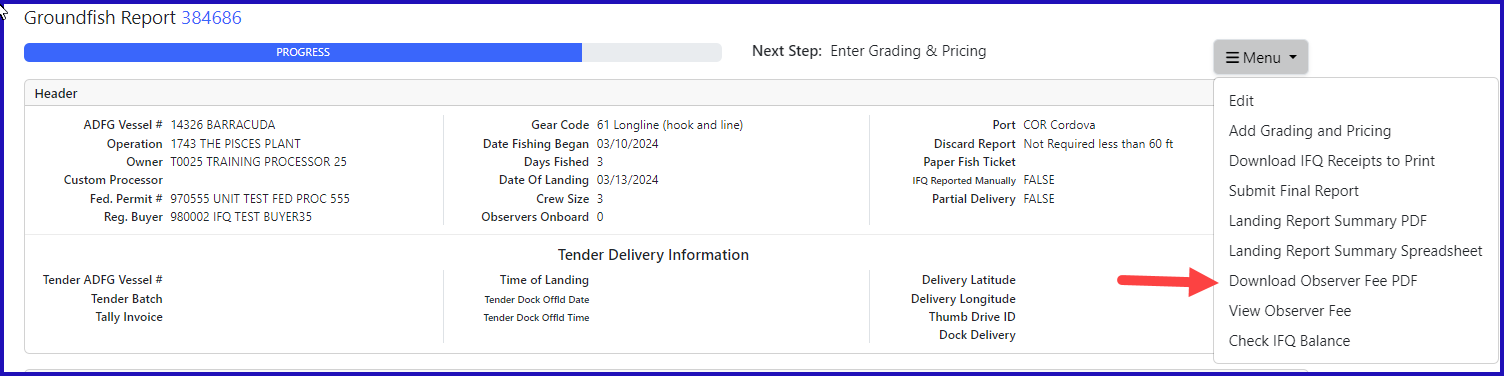
3) Click on the View Observer Fee PDF button to view and print out fees associated with your landing.
- If you have waited for at least 30 minutes and still do not get a fee PDF to generate, you should click on the Observer Fee Details button to find out more information
...
To download the PDF version of these instructions, click on the link below:
IFQ and CDQ with Max Out Lbs.pdf