Catcher processors can use their daily production reports to create and populate landing reports and fish tickets.
NOTE: Please note that the consolidated report option should only be used by catcher processors, not motherships.
1. After production reports have been created, go to File....New and choose Consolidated as Type of Report.
Click OK.


2. Choose a date range for which you would like to create a consolidated landing report, based on your
production report entries. This could be done weekly, or for a whole trip. Click OK.


3. Enter the crew size of the fishing crew for this date range, which includes the skipper but not observer or the
production crew. You'll notice all of the management programs for the data range you entered are listed as
separate rows. Highlight one row at a time and click on the Enter CFEC Permit button to enter permit
information for that management program.


4. A Permits dialog box will open with an illustration of a CFEC permit card.
...
Enter permit information in the fields supplied.


5. Highlight the next row of a different management program and click on the Enter CFEC Permit button again.
- Repeat step #4 again. You'll need to repeat these steps again until you have entered permit information for all management programs listed for the specified date range.
- When you are finished entering permit information for all management programs listed for the specified data range, click on the OK button.


A landing report will be created that has separate fish tickets for each management program and for each gear type listed. The screen shot below shows the landing report created.
...
- Verify the header information that has been filled out based on your production report entries for that date range, gear type, and management program.
- Verify that the date fishing began is the first day that you processed fish for that date range of interest, and the date of landing is the last day that you processed fish for that date range of interest.
- ADF&G processing code (purchaser/owner): is preloaded from your selected operation. If you want to change it, then choose the appropriate code from the drop down.
- ADF&G Processor Code (custom processor): If you are doing custom processing then you will need your processing code here and the F-code of the company you are processing for as the purchaser/owner.
- Port of Landing: catcher processors use: FCP.


Permits & Pounds
- Click on the Permits & Pounds tab.
- Verify the CFEC permit information is correct. If you must make changes to the CFEC permits entered, highlight a row and click on the Open button.
- This will also be necessary if you fished under an IFQ management program so that you can enter the NMFS ID and IFQ permits and species.


- A Permits dialog box will open where you can make changes to your entries or add permit information as highlighted in yellow below. Click OK.


Itemized Catch
- Make sure your itemized catch is correctly assigned to your permits, and verify all the catch you expect for that date range is included on your consolidated report.
- If you wish to edit the weight or number of animals assigned to a permit, highlight a line of itemized catch and click on the Open button.


- An Itemized Catch dialog box will open and you can edit weight or number of animals reported, or you may add grading and pricing information. Grading and pricing is not required on these reports.
- When you are finished entering information for the line item, click on the OK button to accept changes.
- The Cancel button cancels the change and the Remove button removes grading and pricing information for that line item when the row is highlighted.


NOTE: Do not make changes to the weights or numbers of animals without also making the same changes to
your production reports off of which your landing report is based.
- Changing your landing report does
...
- not automatically make the same changes to your production report
...
- !!!
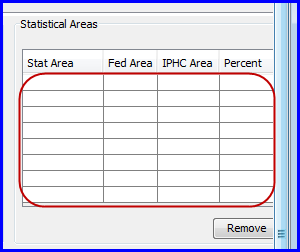
Statistical Areas
- You can leave the Statistical Areas worksheet blank since you've already entered this information on your production reports.
- The statistical areas are shown as a field in your itemized catch lines.
...
Summary Tab
If you fished for any IFQ species you will need to generate an IFQ Report.
- Go to the IFQ Reports tab.
- Locate and click on the Generate IFQ Report button.

- By highlighting each line, you will see the stat areas and pounds caught in each area.
- Verify that the pounds and areas they were caught in are accurate.
...
- To quickly verify species weights as landed pounds and round pounds, access the Summary Tab and review.
- This is a good way to reconcile production report weights with landing report pounds.

Save and Transmit
- Prior to saving your report, go tot he header section of seaLandings and click on the checkmark icon located there.
- If there are any error in your report you will get notification of what it is.

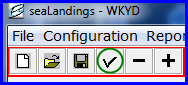
- Now you can save your report by clicking on the floppy disk icon or by going to File...Save...
- The report must be closed before you can transmit it.
...
- After you've transmitted the report AND processed your receipt, you can save and print the fish ticket by highlighting one of CFEC lines and clicking on the Fish Ticket button.
- A fish ticket will be saved in your directory C:\Program Files\seaLandings\pdf.


NOTE: Do not make changes to the management program or management program ID without also making the
same changes to your production reports off of which your landing report is based. Changing your landing
report does not automatically make the same changes to your production report.