eLandings User Manual
Crab Landing Reports
- Jennifer Hogan (Unlicensed)
- Sara Villafuerte - NOAA Affiliate
- Former user (Deleted)
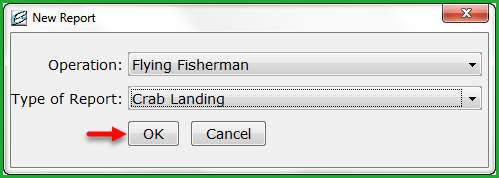
To create a crab landing report, go to File...New and choose Crab Landing Report as Type of Report.
Enter header information for your crab landing report on the Vessel/Location/Status tab.
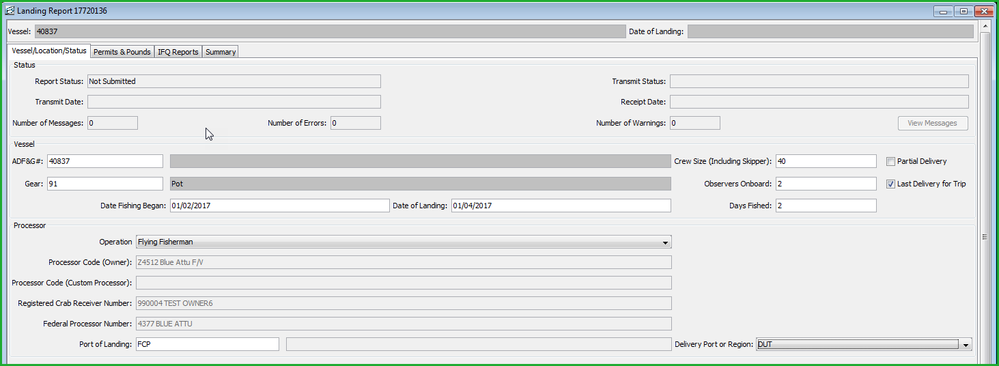
ADF&G No.
- This is the five digit number permanently assigned by the Commercial Fishery Entry Commission (CFEC).
Gear
- This is the two digit numeric code used to identify the gear used to harvest the catch.
- Gear codes can be found in the seaLandings program tool bar by clicking on the Gear Codes link.
Crew Size
- The number of licensed fishing crew on board the vessel, including skipper.
Partial Delivery
- Partial delivery of a trip; not all the catch was delivered and reported in this landing.
Last Delivery
- Last delivery of a trip.
- The Partial Delivery or the Last Delivery box should be check-marked for rationalized crab fisheries.
Delivery Port or Region
- Operations that have an IFP port code (stationary floating processors) are able to report where they delivered their crab catch.
Observers Onboard
- The number can range from zero 0 to 5, and references the number of state of Alaska certified crab or NMFS certified groundfish observers on board the vessel for that fishing trip.
Date Fishing Began
- Date when the gear was deployed in the water to begin fishing (MMDDYYYY).
Date of Landing
- Date when the landing was completed.
Days Fished
- Dates when the gear was in the water for fishing.
- This number does not include traveling to and from the fishing grounds, or weather delays (MMDDYYYY).
Processor Code (Owner)
- The owner of the product that has just been purchased - the purchaser. This value is auto-filled from data entered during your User Agreement registration.
Processor Code (Custom Processor)
- Applicable only if the product is being received or processed by a third party - not the purchaser.
- Leave blank if not applicable.
Registered Crab Receiver
- Automatically filled in.
Federal Processor Number
- Automatically filled in.
Port of Landing
- Please mark FLD if your vessel is a mothership, FCP for catcher processors, or IFP for stationary floating processors.
When you are finished entering vessel and location information, click on the Permits & Pounds tab.
Click on the New button in the Permits section.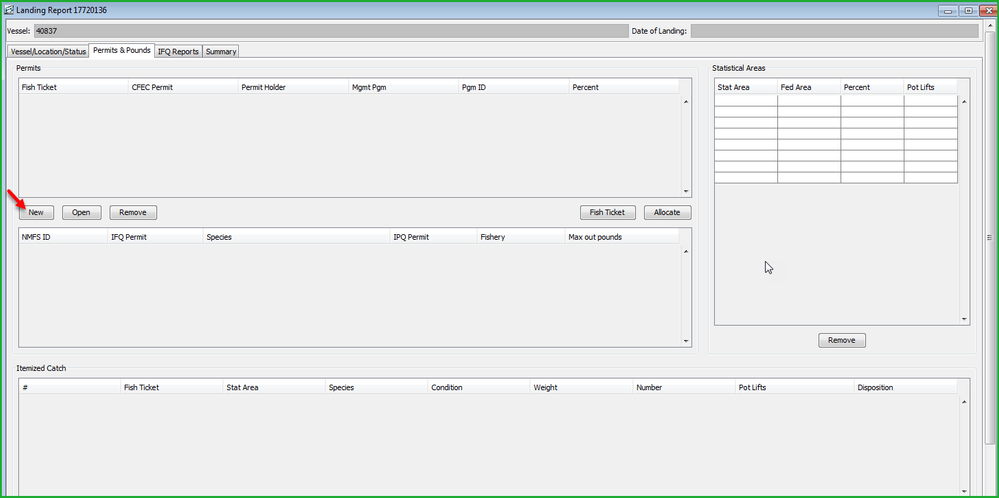
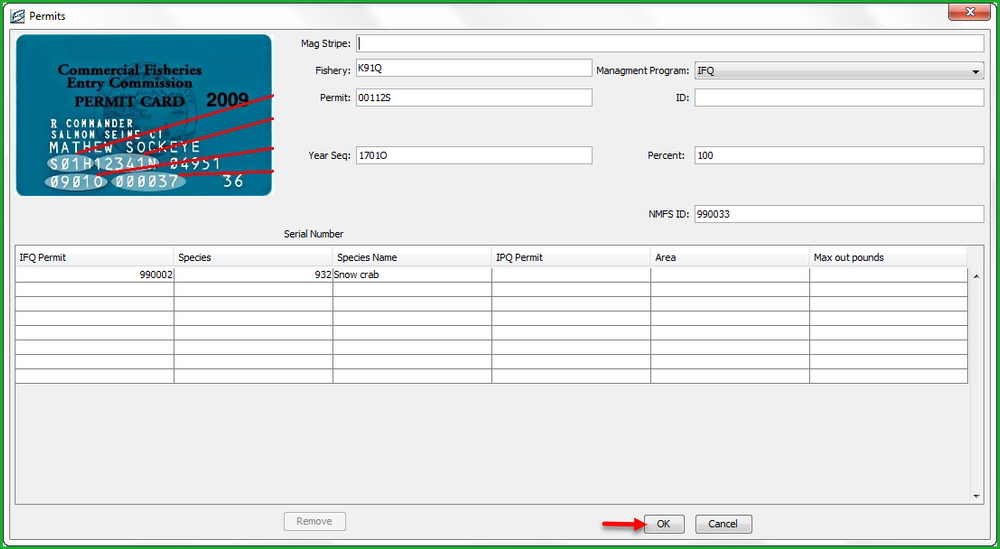
Enter your CFEC permit information.
The CFEC permit card contains the name of the individual, the specific fishery, the Permit, e.g. K91T12345Z, and a Permit Sequence, e.g. 0501H.
- Fishery: In this example would be K91TC. Since the permit is valid for a CDQ fishery, the CFEC fishery contains an extra letter. Another example is K91TA. Each CDQ group CFEC permit contains this extra letter that corresponds to each group A through F.
- Permit: five digits that follow the CFEC fishery. In the above example the permit number is 30401S.
- Year Sequence: to the right of the CFEC permit number. The permit sequence provides information on the valid year of the permit, the sequence of issue of the permit, followed by a letter, e.g.,0401M. This Permit Sequence example indicates that the permit is valid for 2004 - the "04" and the sequence indicates that this is the first permit issued for this permit holder - 01. The M assists in creating a unique permit. If the permit card was lost and a second card issued, the sequence would be 02.
- Management Program: the management programs are selectable from the down arrow to the right of the management program field.
Management Program | Description |
IFQ | Rationalized Tanner and King Crab of the Bering Sea and Aleutian Islands |
CDQ | Community Development Quota Crab program of the Bering Sea and Aleutian Islands |
LE | Limited Entry (CFEC) crab |
OA | Open Access (State or Federal) |
CPF | Commissioner's Permit Fishery |
RES | Research |
TEST | Cost Recovery Test Fishery (State) |
ADAK | Adak Crab Fishery |
- ID:Provide an ID for the CDQ management program only.
- Percent: Allocation of catch by percentage among the CFEC Permit Holders is an optional function. If the landing consists of only one CFEC Permit Holder, put 100n will be 100% to the one CFEC Permit Holder. If the landing consists of more than one CFEC Permit Holder, and each permit holder want an equal allocation among the holders, leave the Percent field blank. If the landing consists of more than one CFEC Permit Holder, and each permit holder wants a specific percent of the total catch, live/sold and deadloss, to be allocated to specific percentages, list the percentages as whole numbers.
- NMFS ID: Each individual CFEC permit holder identified in the landing report must have a corresponding NMFS ID. All Hired Masters must have a NMFS ID. This permit number identifies an individual, not a cooperative or a CDQ group. Enter the NMFS ID for each individual fishing and selling product. If the CFEC permit holder/IFQ shareholder or cooperative Hired Master representative does not have a NMFS ID, contact NMFS - RAM Division immediately, M-F business hours, or the IFQ Data Clerks after hours, for instruction on how to complete the landing report.
- IFQ Permit: An unlimited number of IFQ permits and the species associated with the IFQ permit(s) can be entered for each corresponding NMFS ID. If no IFQ permits were used to collect your catch, leave this field blank.
- Species: Enter the three-digit species code that is associated with the IFQ permit.
- IPQ Permit: Individual processing quota which puts a cap on the allowed A-shares a company may receive. If you are a catcher processor fishing C or U shares, then leave IPQ blank.
- Lbs. to Max-Out Permit: max our (zero out) either the IFQ account for the corresponding species entered using this field. As quota share permit balances for the IFQ shareholder move close to exhaustion, the Lbs. to Max-Out Permit feature can be a helpful tool to zero out the permit account. The permit holder should check the balance on the specific permit prior to using this feature, as it will zero out the account balance within one pound. This feature may be used only when more than one IFQ permit is associated with the landing report. The IFQ permit may be for the same CFEC/NMFS ID individual or for more than one CFEC/NMFS ID persons. To max out an IFQ account, enter all the CFEC and IFQ Permit Worksheet information. Select the permit that you want to max out and enter the poundage that will zero out that account. The poundage recorded in this field will be debited from the identified IFQ account, proportionally from the live/sold and the deadloss recorded for the entire off-load.
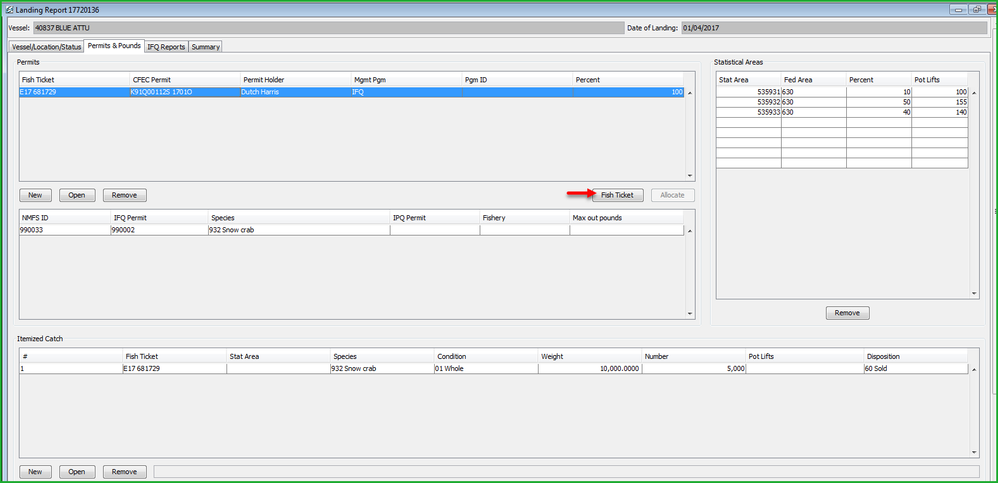
Below is an example of permit information entered for IFQ crab catch.
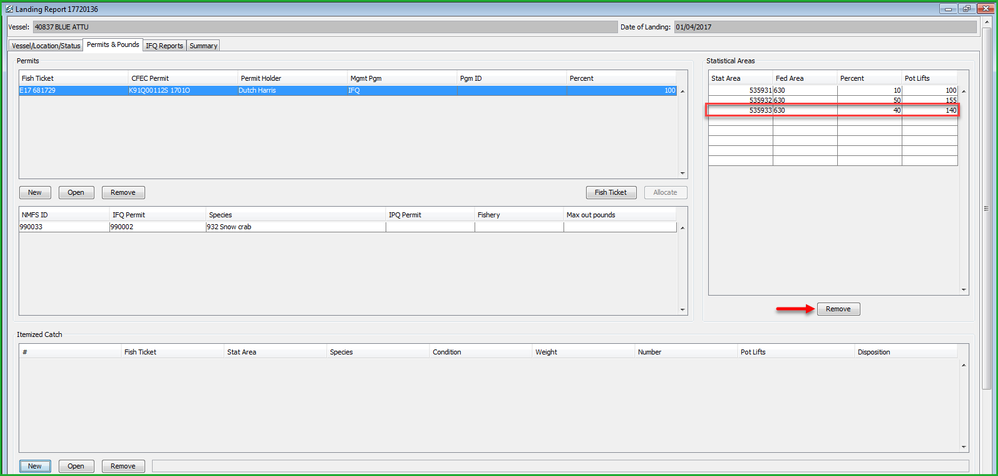
Entering Statistical Areas
Put your cursor in the Stat Area field and enter a 6-digit statistical area, the percent of catch that was hauled in this area, and the number of pot lifts that were done in this area. If you wish to remove any of the areas you entered, highlight any field in that row and click on the Remove button.
Entering Itemized Catch
In the Itemized Catch section, click on the New button to start entering itemized catch.

Enter your catch in the Itemized Catch dialog box that opens.
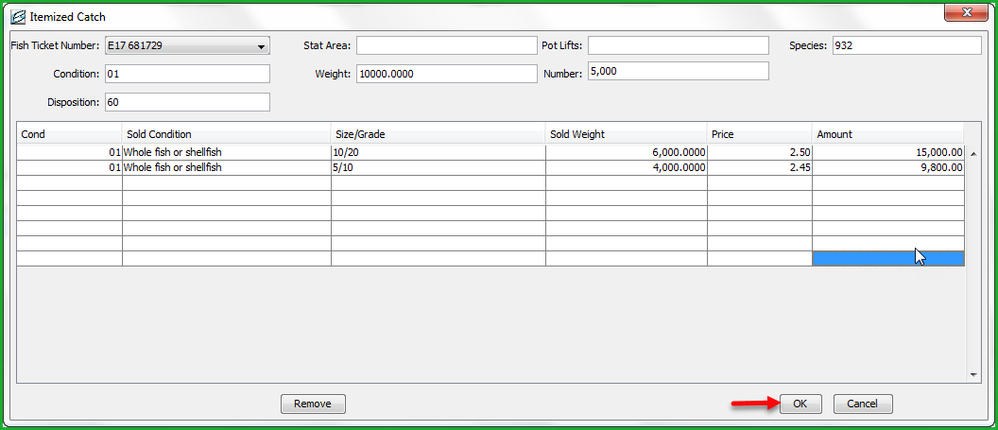
Enter the following codes:
- Species
- Condition (Delivery Condition)
- Pounds - enter the raw pounds of crab
- Number - number of animals caught; a required field. The program calculates an average weight for each species and will give an error message if the number of animals is unreasonable.
- Pot Lifts - if you used the statistical area worksheet, leave this field blank.
- Disposition - the intended use or disposal of the product; if you are a catcher processor, enter sold for human consumption (60) or deadloss (79).
- Statistical Area - if you used the statistical area worksheet, leave this field blank.
- Grading and pricing is optional. Click OK when you are finished.
When you are done entering your itemized catch, click on the IFQ Reports tab.

Generate IFQ Reports
Click on the Generate IFQ Reports button on the IFQ Reports tab.
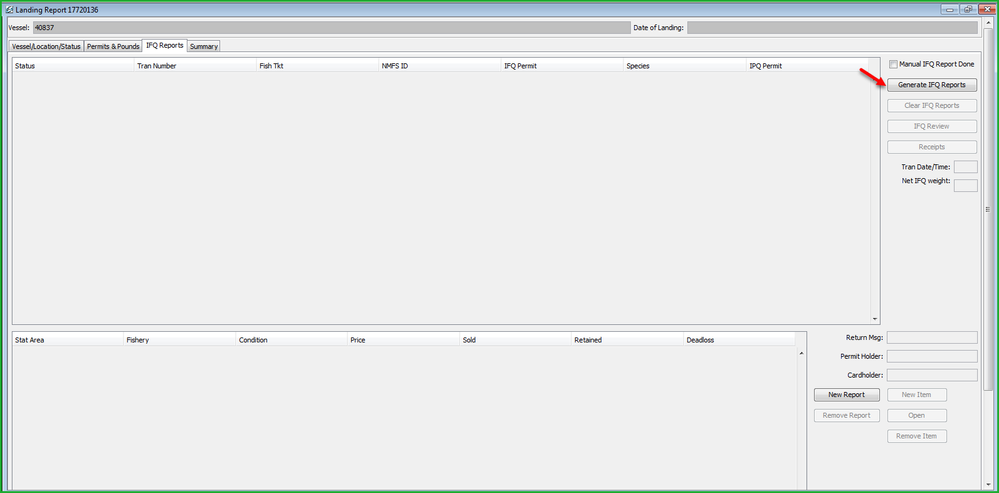
Your IFQ reports are now visible.
If you wish to preview your IFQ reports, click on the IFQ Review button. You first will need to save your report and correct any errors.

You can delete your IFQ reports by clicking on the Clear IFQ Reports button. There are a few scenarios when you might need to remove an unsubmitted IFQ Report:
- If you generated the IFQ report, but then ended up doing a manual landing via the Data Clerks.
- In this case, you should not transmit your landing report until you delete the unsubmitted IFQ repots.
- You need to edit the itemized catch or stat area worksheet on your landing report.
- In this case you need to clear the IFQ report, make your edits, and then re-generate the IFQ report for the second time.
Viewing Your Report
You can view a summary of your landing report by clicking on the Summary tab.

Then go to Reporting....Transmit Reports to transmit that report. Please email the transmission file to elecrep@noaa.gov. Remember, transmission files start with the word 'transmit' and are saved in the directory C:\program files\seaLandings\transmissions.
After you process your receipt, you can view your fish ticket by clicking on the Permits & Pounds tab, highlighting a permit, and clicking on the Fish Ticket button.
After you click on the Fish Ticket button, you will be directed to save the fish ticket in C:\Program Files\seaLandings\pdf. After you save the file, the saved fish ticket will open in a new window for you to review and print.