eLandings User Manual
Catcher-Processor Groundfish Landing Report
- Susan Hall - NOAA Federal (Unlicensed)
- Sara Villafuerte - NOAA Affiliate
To create a Groundfish landing report in seaLandings, login to the program
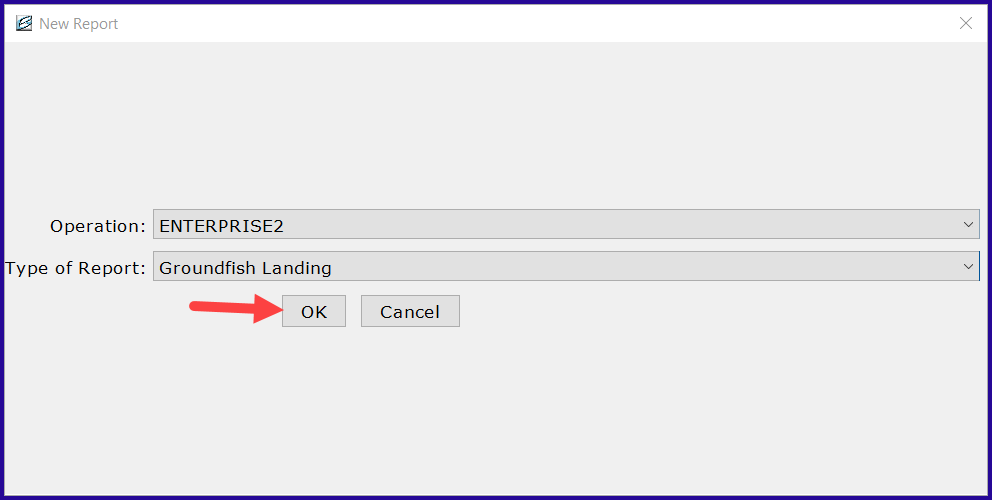
Go to File > New

- Select the report type from the drop-down menu and then click on the Ok button
The landing report window will pop-up where fishing information can be entered into specific fields, in tabbed order.
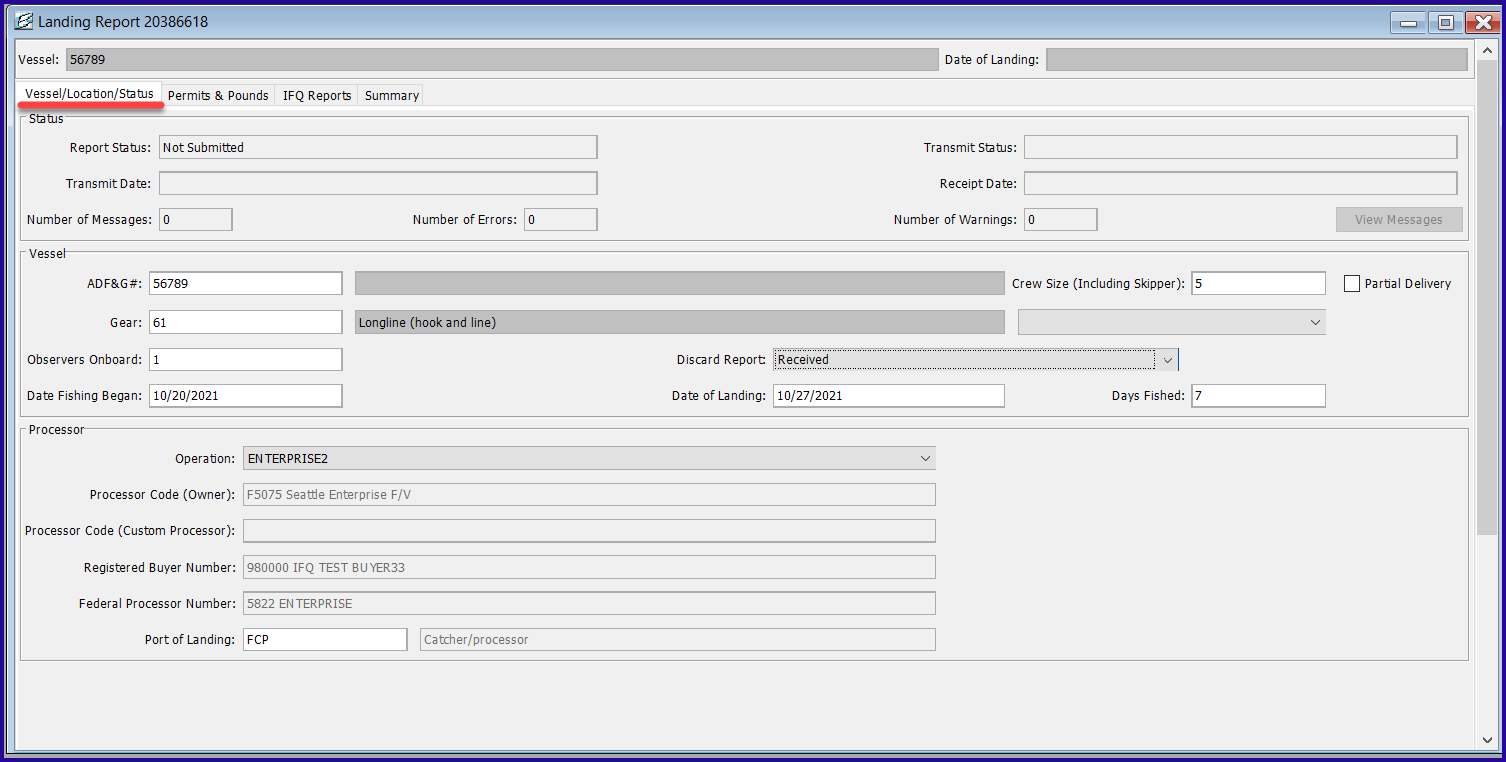
Vessel/Location/Status
Enter the following Vessel information:
Vessel ADF&G# - this should be auto-filled
- Crew Size - enter the number of crew onboard
- Partial delivery - this box needs to be checked if you are not delivering all of your catch at one location
- Gear - enter your vessel gear type
- Gear Modifier (pot gear only) - indicate slinky or hard pot
Observers Onboard - enter the number of observer on the vessel
- Tender ADF&G # - not applicable when acting as a CP
- Discard Report - select applicable status from drop down menu
- Date Fishing Began - date when fishing gear went into the water
- Date of Landing - date when vessel offloads catch
- Days Fished - number of days
Processor Section
- Processor Code (Owner) - The owner of the product that has just been purchased - the catcher processor.
- This value is auto-filled based on information entered during your User Agreement registration.
- Processor Code (Custom Processor)* - not applicable
Registered Buyer Number -This should be auto-filled for you if you have a RB permit
- Federal Processor Number - This is your Federal Fishery permit number and should be autofilled
- Port of Landing - This should always be FCP (floating catcher processor)
When you are finished entering vessel, and location information, click on the Permits & Pounds tab.
Permits and Pounds
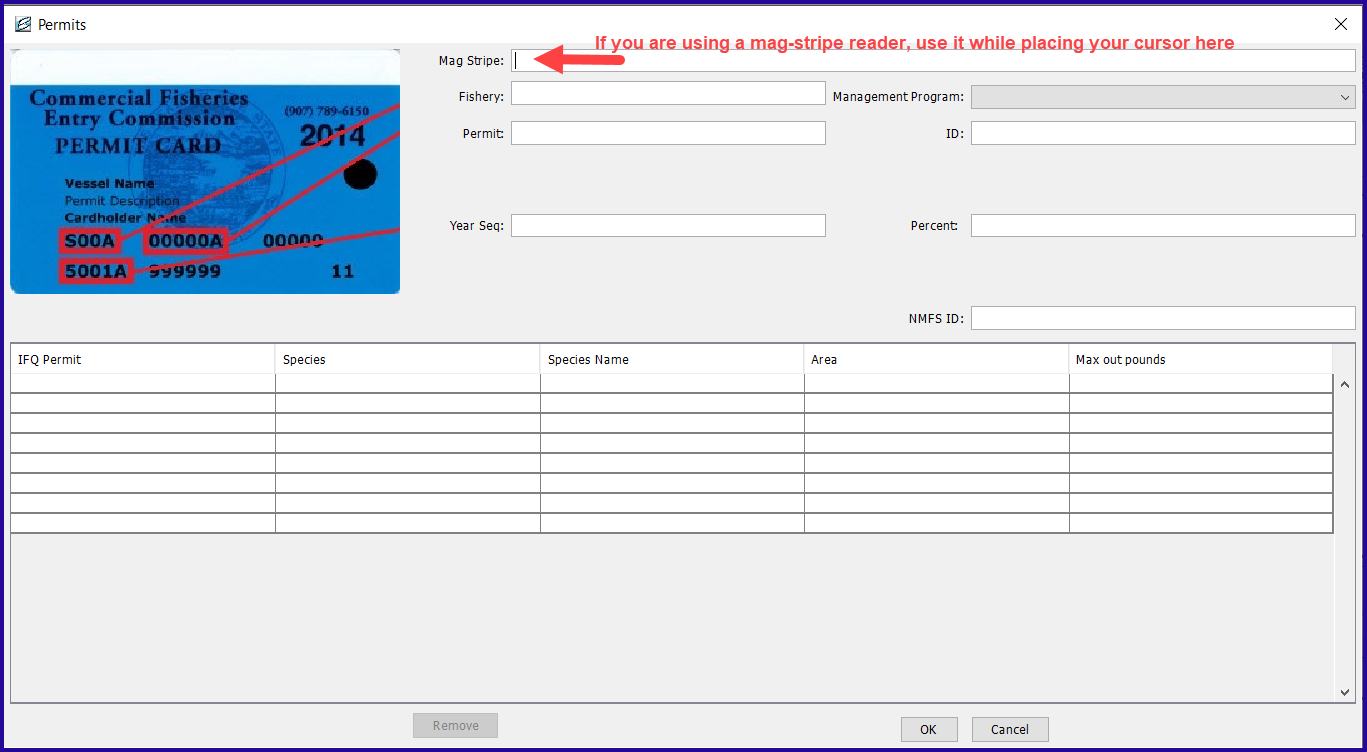
Under the Permits section, click on the New button and a Permits window will pop up where you can enter required information.
- CFEC fishery permit - this can be entered with a mag-stripe reader or manually
- Management Program - Use the drop down arrow to select the appropriate management program
- ID - If fishing under AFA, CDQ, or RPP you will need to enter the program ID you're fishing under
- NMFS ID - Required if landing IFQ species
- IFQ Permit
- Species
Click Okay when all appropriate information has been entered in the permits worksheet.
Statistical Area Worksheet
You can enter your state statistical areas in the Stat Area worksheet provided the areas fished, add up to 100%.
- If the areas fished don't add up to 100% easily then you can enter the statistical areas in the Itemized Catch box
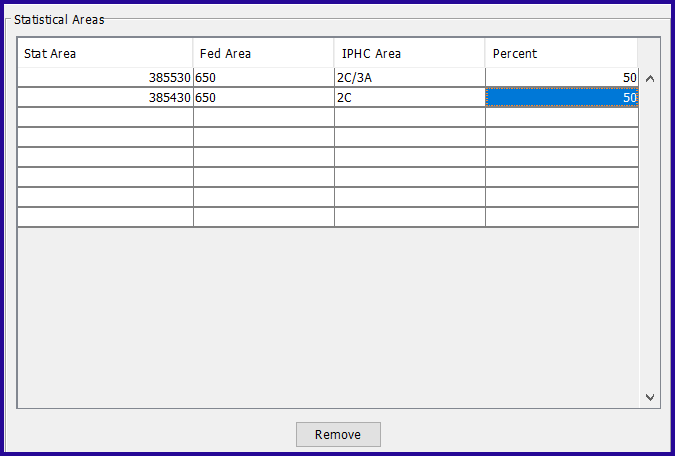
- If you decide that you made a mistake, you can edit the information by highlighting the cell and editing it or highlight the cell and click on the Remove button
Itemized Catch
In order to add your catch information, you will need to locate the New button in the Itemized Catch section of the Permits and Pounds window.
- Click on the new button and the Itemized Catch window will pop-up.
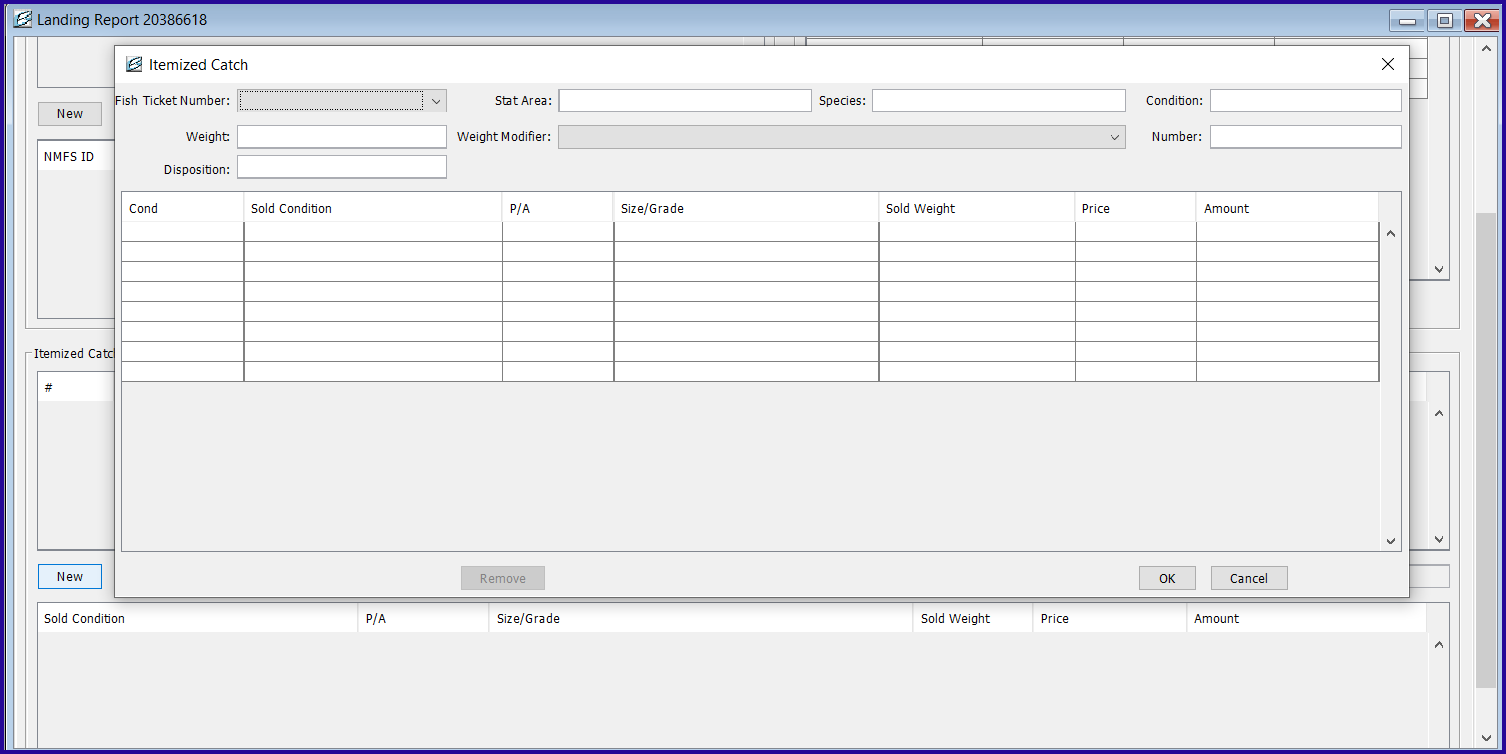
- Fish Ticket Number - Select the fish ticket number using the drop down arrow
- Stat Area - Enter here if you didn't use the Stat Area Worksheet (when all areas fished equals 100%)
- Species - Enter species
- Condition - Enter the appropriate condition code
- Weight - Enter weight in pounds
- Weight Modifier - Only used for halibut and sablefish
- Number - Enter number of crab (if applicable) or PSC
- Disposition - Enter the appropriate code that describes what you intend to do with the fish (i.e. 60 = Sold for human consumption)
Click on the Ok button when you're done and the New button for adding more species.
If you harvested any IFQ species, you will need to move on to the IFQ Reports tab.
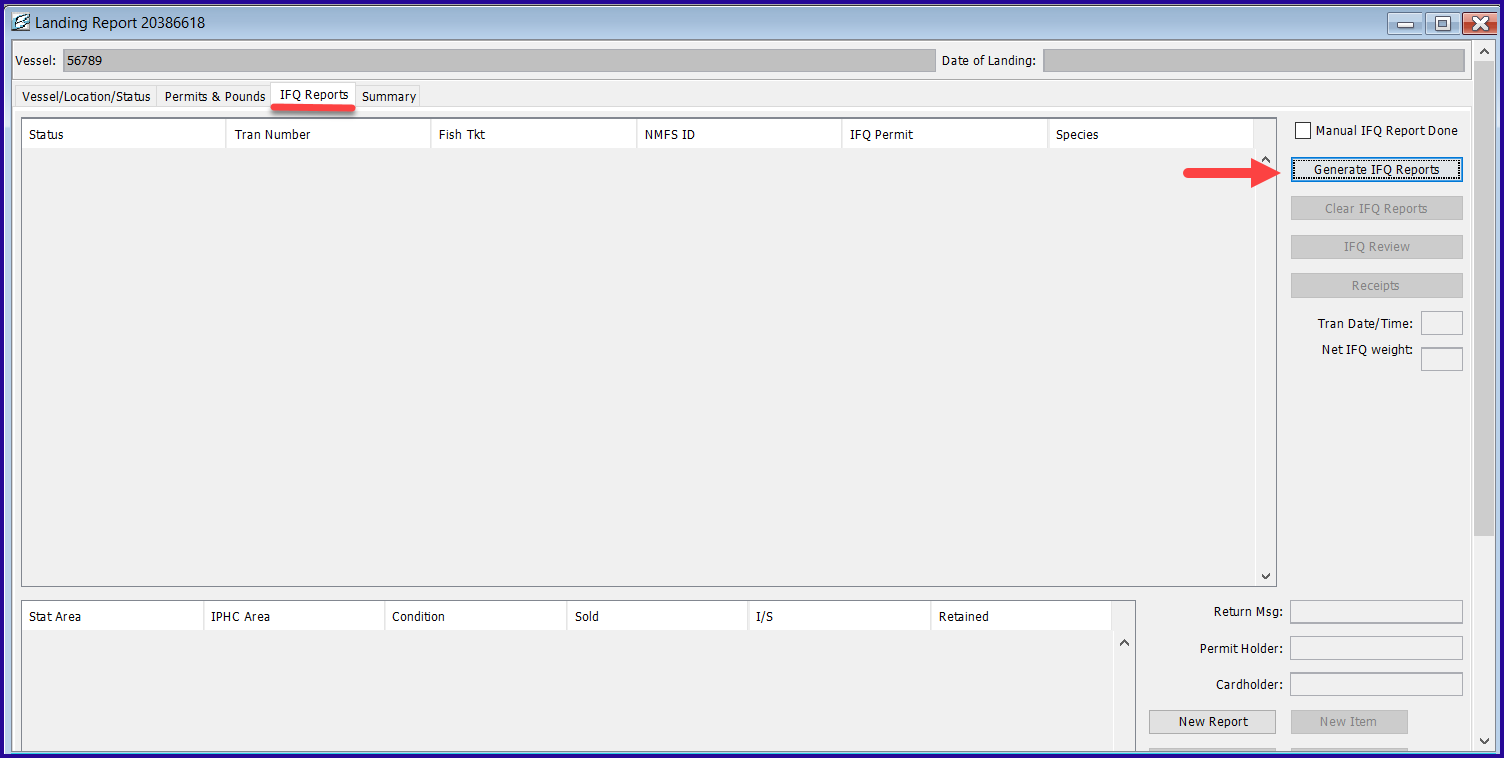
IFQ Reports
In order to generate your IFQ report you will need to go to the IFQ Reports tab.
- Click on the Generate IFQ Reports button and the IFQ report will generate and populate all the IFQ catch for your review.
Click on the IFQ Report to display the allocation of catch for each stat area.
- If you want to make changes or edits you have the option to Clear IFQ Report and go back to the Permits & Accounts tab to make any desired changes.
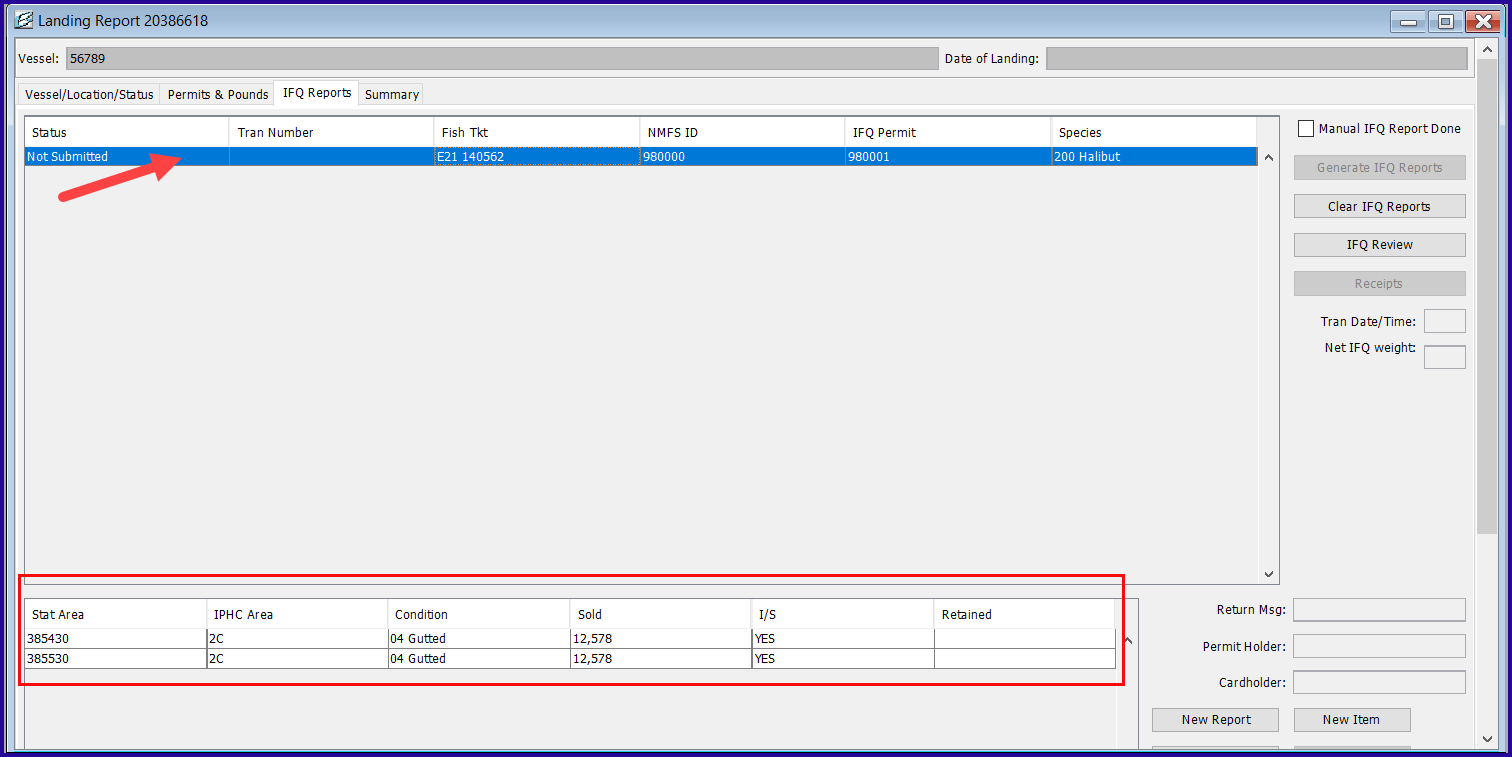
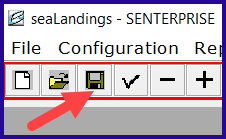
Click on the disk icon in the top task bar to save the landing report. Now your report is ready for transmission.