eLandings User Manual
How to Configure tLandings for Use on a Tender Serving Two Processors
- Jennifer Womack - NOAA Affiliate (Unlicensed)
- Anthony Naciuk
There are times when one tender will work for and take deliveries from two different processors during the same opening. There are two different options to accomplish this task.
First Option: Use Two Different Laptop Computers
The first option, and the easiest is to have two different computers, each running a thumb drive configured with the processor's tLandings configured thumb drive. Each processor provides a laptop for the tender operator. We recommend that the laptop's themselves are clearly labeled to distinguish between processing operations. For recommended equipment list please see: tLandings Tender Equipment and Preparation.
Second Option: Two Thumb Drives Configured with tLandings on One Laptop Computer
The second option, if limited by space onboard the tender is to have one laptop computer with two thumb drives.
- One thumb drive for each processor operation.
- Each thumb drive clearly labeled on the exterior with the processor's name to distinguish between the two.
- Each instance of tLandings configured with a different color to differentiate between processors. See next section on how to configure tLandings in PTI and in tLandings in the following section..
How to Configure tLandings to Have a Different Toolbar Color in the PTI to Differentiate Between Processors
At the office, you will log into the PTI.
Click on the download, Prepare thumb drive for tender.
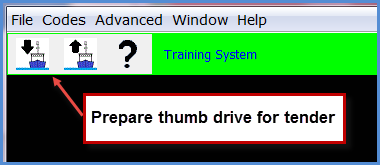
The PTI operates as a wizard, guiding your thru the steps to configure the thumb drive, screen by screen. Most prompts will be NEXT buttons in the lower right hand corner. When you click on the down arrow boat icon (Prepare files for tender), a dialog box, Tender Configuration, opens with a list of all operations associated with your eLandings user account. You may only have one operation to select.
Once you select the operation, select the tender to begin the configuration process.
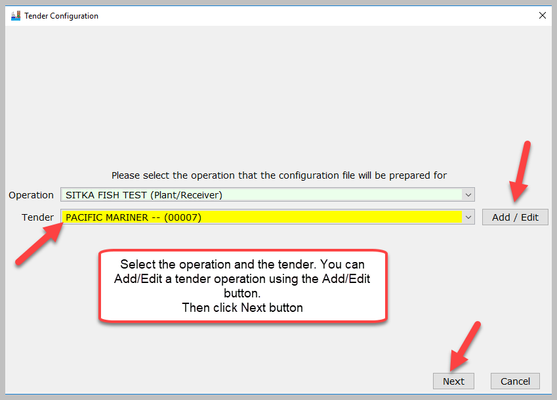
Click the Next button. This will bring you to the Thumbdrive Targets to Receive tLandings Window.
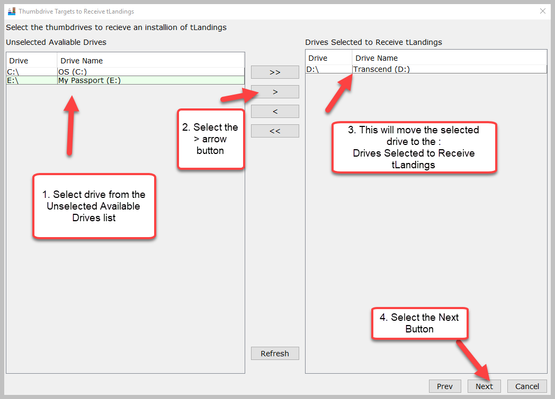
- Select the thumbdrive you want to configure from the Unselected Available Drives and hit the > arrow button.
- This will move the drive to the Drives Selected to Receive tLandings.
This will bring you to the Install tLandings on Thumbdrives window. Click on the Customize Install button.
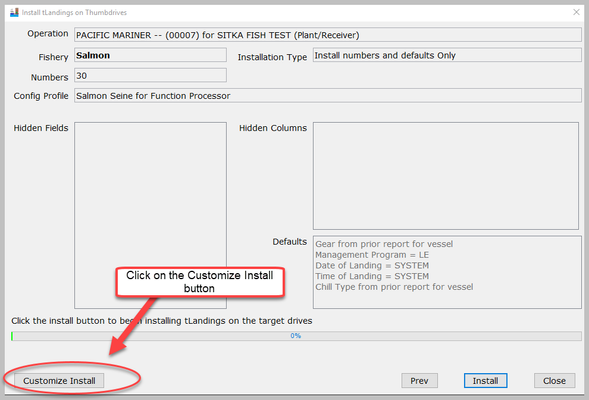
At the beginning of the season you can create several thumb drive configuration profiles and save/store for use throughout the current and future seasons. Customized Configuration Profiles are available for both groundfish and salmon. You will need to complete a Customize Install to create a configuration profile. Profiles are stored and can be edited or deleted at any time.
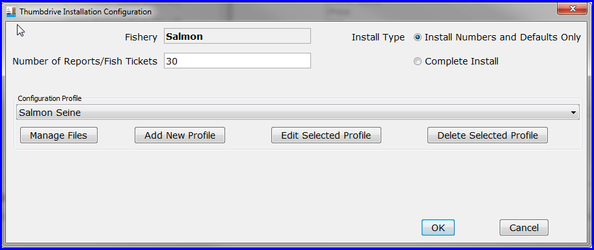
When you click the Customize Install button, a new dialog box opens, Thumb drive Installation Configuration. Please take a minute to review this box and note the Number of Reports/Fish Tickets. In the example the default number is 30, but you may need to install many more unique fish ticket/landing report numbers.
If the configuration profile above does not display, choose Customize Install and choose the Configuration Profile, Salmon Seine. The configuration above will appear.
When you click the down arrow under the Configuration Profile, all your profiles are displayed
.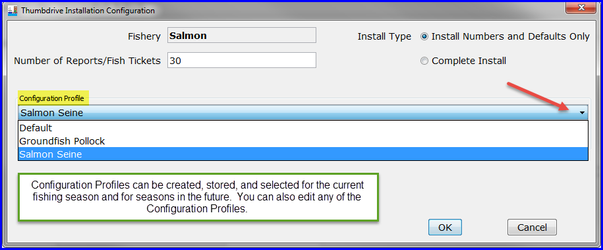
The most recently used profile displays first, which is Salmon Seine. You have two other profiles, Default and Groundfish Pollock.
Each profile can contain the follow customizations:
- Customized hidden fields (Vessel Tab)
- Customized hidden columns (Tally Tab)
- Unique species lists for salmon and groundfish, as well as salmon troll.
- Default values can be establish with any profile, but should be used very carefully.
- Default values from the prior landing report can also be established in the profile.
- The number of reports/Fish Tickets can be defaulted to a specific number or modified with each thumb drive configuration.
You will select the button titled: ADD NEW PROFILE.
When you click the New Profile button, a dialog box appears requesting the name for the new profile. Add a name that will distinguish this profile.
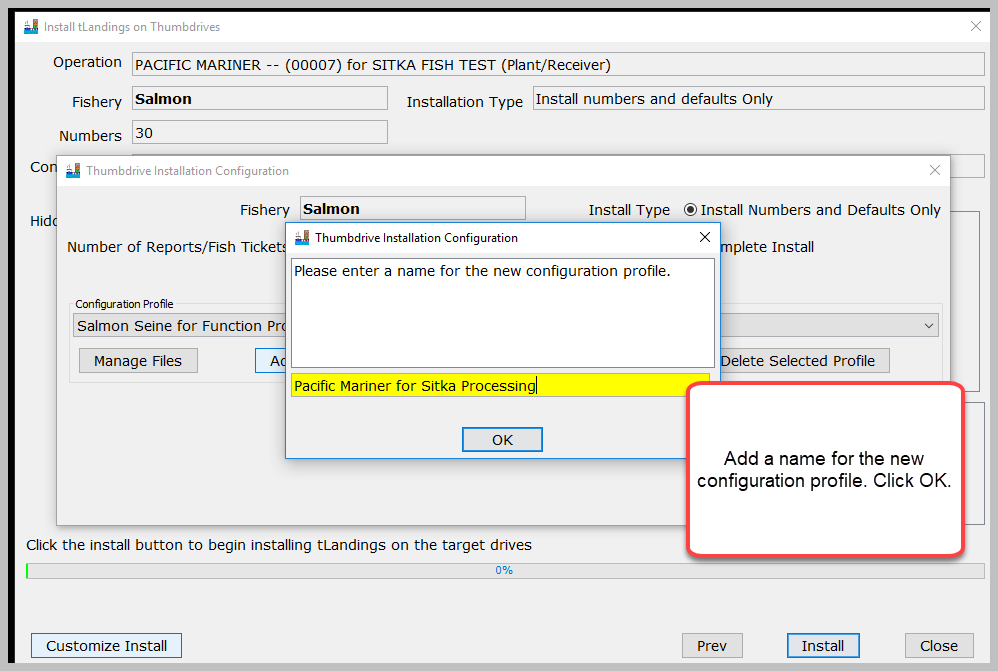
Once you click OK this will bring the up the Settings window the first of the seven tabs will display Configuration Tab. The configuration profile process uses a wizard to walk you through the selections based upon fishery, salmon or groundfish.
On the Toolbar Color, select the dropdown and select a color from the drop down list. (Please confer with the other processor so you both don't choose the same color).
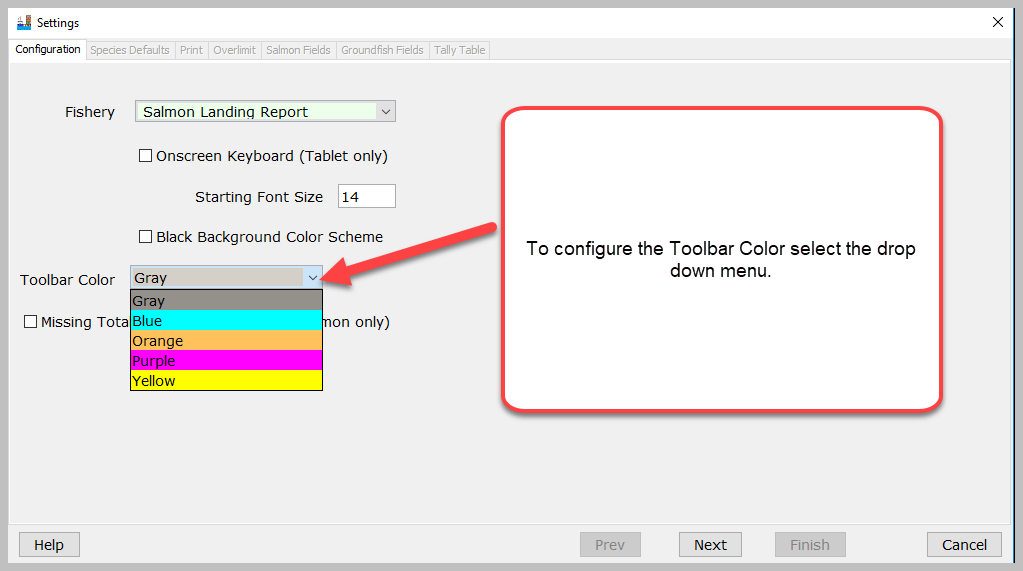
After selecting the Toolbar Color, finish with the rest of the tabs and install tLandings on the thumb drive!
Now when the tender operator opens up tLandings the toolbar will be colored with the color you selected.

Changing the Toolbar Color from within tLandings
If the tender needs to change the color of the toolbar to help distinguish between two different processor's versions of tLandings, they can from the Configuration menu in tLandings.
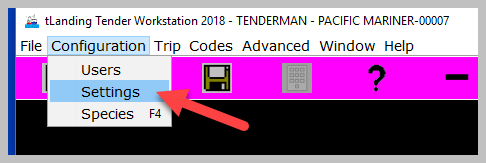
From the Configuration tab select Settings.
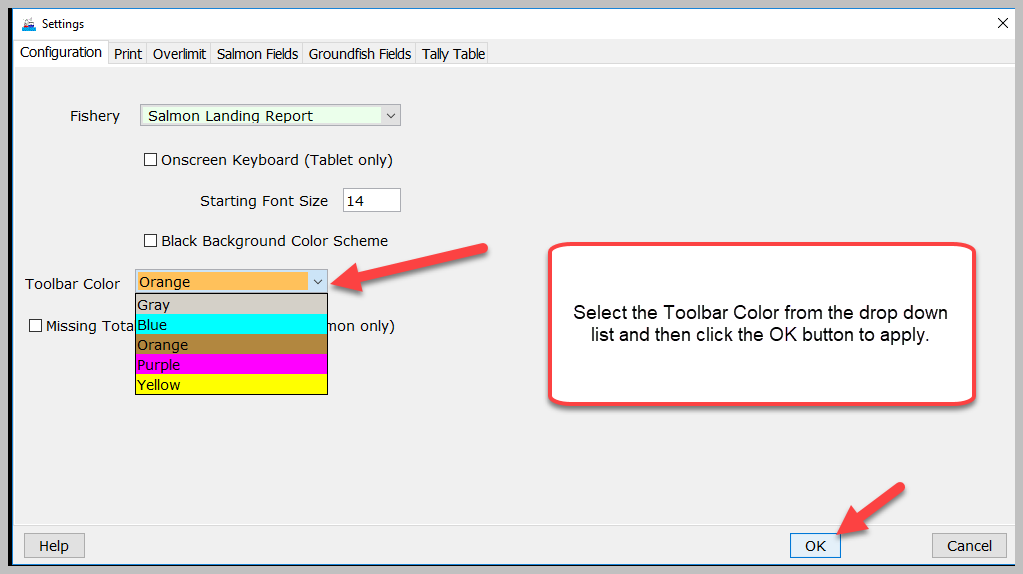
This will bring up the Configuration tab.
Select the color and select the OK button to apply.
Running Two Different Instances of tLandings for Two Different Processors on One Laptop
Each version of tLandings should be configured with a different color toolbar.
Close tLandings Before Opening Second tLandings
It is important that when the tender operator is taking deliveries for the different processor that they close completely out of the other version of tLandings BEFORE opening the second version of tLandings for the other processor.
Download PDF Link: How to Configure tLandings for Use on a Tender Serving Two Processors
How to Download and Print this Article as a PDF
Download:
Click the 3 dots (...) at the top right of the article
Click Export
Click Export to PDF
Wait for the PDF to load, and click Download PDF
Print:
Open the PDF
Print the PDF


Support Contact:
If you have any questions or concerns, please contact elandings@alaska.gov